Create a Unique Handcrafted Christmas Centerpiece, Perfect for Adding Holiday Charm to Your Table
Are you looking to add a touch of holiday charm to your table this Christmas? Look no further! In this step-by-step guide, we will show you how to create a unique handcrafted Christmas centerpiece that will impress your guests and bring festive cheer to your home. With just a few materials and a little bit of creativity, you can create a stunning centerpiece that will be the highlight of your holiday decorations. Let’s get started!
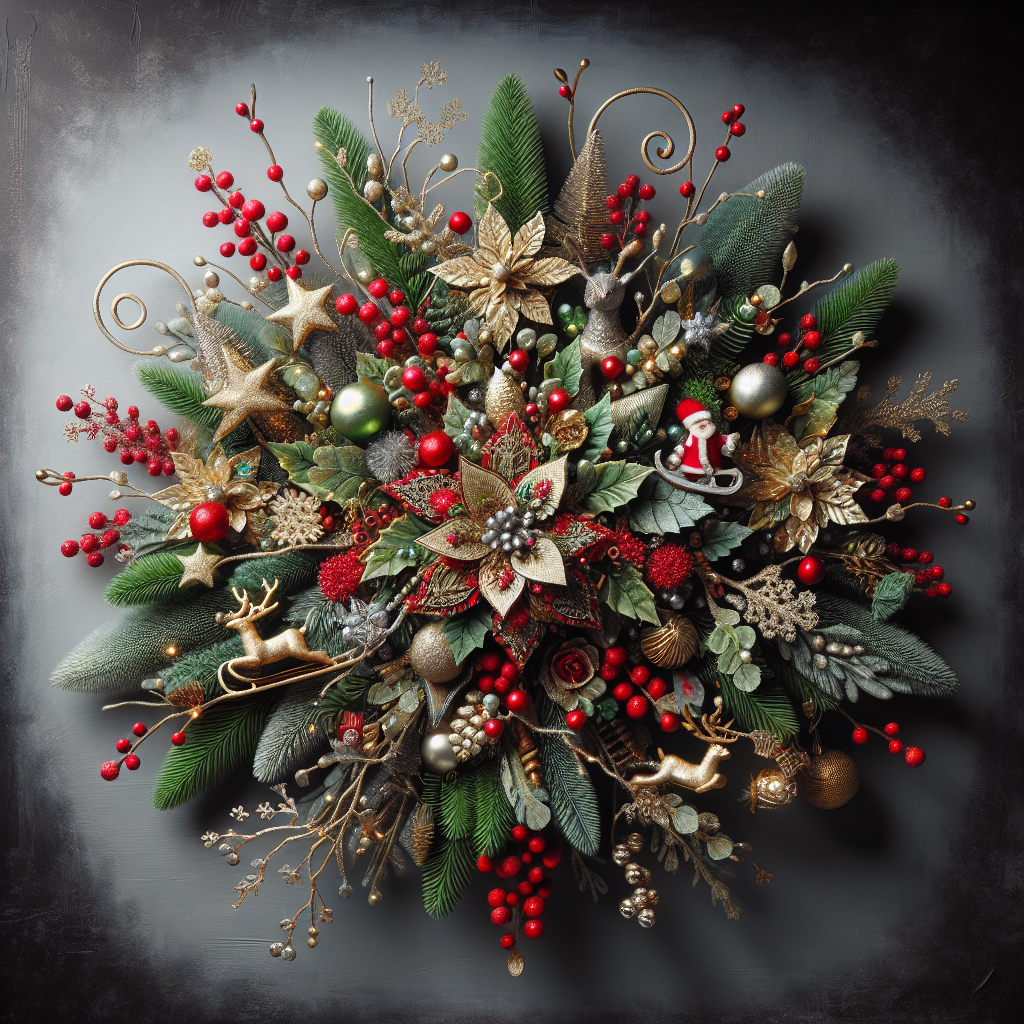
Materials Needed
- Glass vase or jar
- Artificial pine branches
- Assorted Christmas ornaments
- Miniature LED lights
- Decorative ribbon
- Hot glue gun
- Scissors
Step 1: Prepare the Base
Start by selecting a glass vase or jar that will serve as the base for your centerpiece. Make sure it is clean and free from any dust or debris. You can choose a clear vase to showcase the contents or opt for a colored one to match your Christmas theme.
Step 2: Add the Pine Branches
Take the artificial pine branches and arrange them inside the vase, making sure they are evenly distributed. You can trim the branches to fit the height of the vase if necessary. The pine branches will serve as the foundation for your centerpiece and provide a natural and festive touch.
Step 3: Attach the Christmas Ornaments
Now it’s time to add some sparkle to your centerpiece! Take the assorted Christmas ornaments and attach them to the pine branches using a hot glue gun. Be creative with your placement and mix different sizes and colors for a visually appealing look. The ornaments will add a pop of color and shine to your centerpiece.
Step 4: Incorporate Miniature LED Lights
To create a magical ambiance, incorporate miniature LED lights into your centerpiece. Wrap the lights around the pine branches, making sure they are evenly distributed. The soft glow of the lights will add warmth and charm to your table.
Step 5: Tie a Decorative Ribbon
To add a finishing touch, tie a decorative ribbon around the neck of the vase or jar. Choose a ribbon that complements your Christmas theme and adds an extra festive element to your centerpiece. You can tie a bow or create a simple knot, depending on your preference.
Step 6: Final Touches
Take a step back and admire your handiwork! Make any necessary adjustments to ensure everything is balanced and visually appealing. You can also add additional embellishments such as pinecones, berries, or even a small figurine to personalize your centerpiece further.
Estimated Time
This project can be completed in approximately 30 minutes, depending on your level of experience and the complexity of your design. Take your time and enjoy the process of creating a beautiful centerpiece that reflects your personal style.
Inspiration
Imagine your dining table adorned with a stunning handcrafted Christmas centerpiece. The soft glow of the LED lights illuminating the room, the vibrant colors of the ornaments catching the eye, and the fresh scent of pine filling the air. Your guests will be in awe of your creativity and attention to detail. This centerpiece will not only add holiday charm to your table but also create a warm and inviting atmosphere for your loved ones to gather and celebrate.
Summary
Creating a unique handcrafted Christmas centerpiece is a fun and rewarding DIY project that will add a touch of holiday charm to your table. By following these step-by-step instructions, you can easily create a stunning centerpiece that will impress your guests and bring festive cheer to your home. Remember to gather all the necessary materials, take your time with each step, and let your creativity shine. Get ready to create a centerpiece that will be the talk of the town this Christmas!


