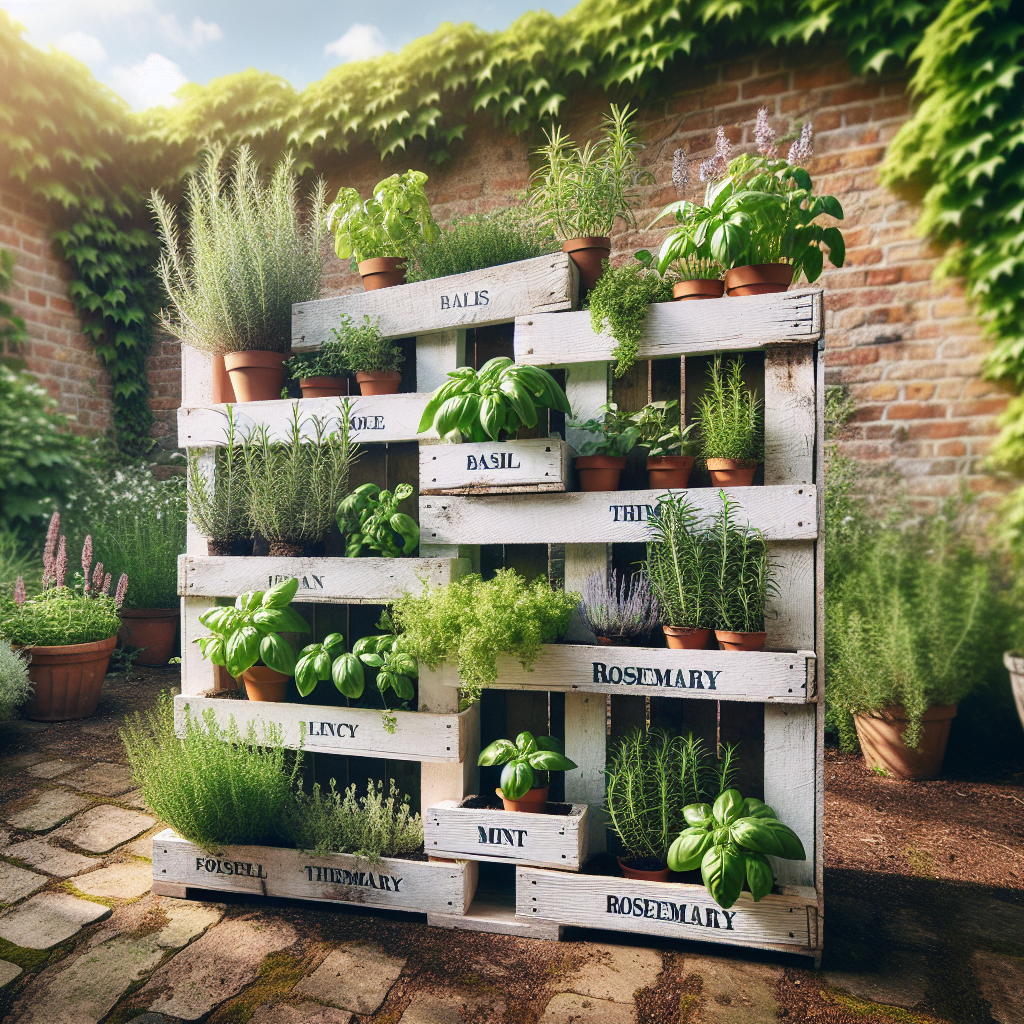
Rustic Pallet Herb Garden for Culinary Delights
Are you a food enthusiast who loves to experiment with fresh herbs in your cooking? Do you dream of having your own herb garden but lack the space or resources? Look no further! In this comprehensive guide, we will show you how to create a stunning rustic pallet herb garden that will not only add a touch of charm to your outdoor space but also provide you with a bountiful supply of aromatic herbs for your culinary delights.
Materials Needed
- Wooden pallet
- Landscaping fabric
- Staple gun
- Herb plants or seeds
- Potting soil
- Hammer
- Nails
- Saw
- Paint or stain (optional)
- Paintbrush (optional)
Step 1: Prepare the Pallet
The first step in creating your rustic pallet herb garden is to prepare the pallet. Start by inspecting the pallet for any loose or protruding nails. Use a hammer to remove any nails that may pose a safety hazard.
Next, decide on the orientation of your pallet garden. You can choose to have the pallet standing upright or lying horizontally, depending on the space available and your personal preference.
If you prefer a more polished look, you can paint or stain the pallet using a color of your choice. This step is optional but can add a touch of elegance to your herb garden.
Step 2: Secure the Landscaping Fabric
To prevent soil from falling through the gaps in the pallet, you will need to secure landscaping fabric to the back and sides of the pallet. Cut the fabric to fit the dimensions of the pallet, leaving a few extra inches on each side.
Using a staple gun, attach the landscaping fabric to the back and sides of the pallet, ensuring that it is taut and securely fastened. This will create individual pockets for each herb plant, preventing them from intertwining and competing for space.
Step 3: Add Potting Soil
Now that your pallet is prepared, it’s time to add potting soil. Fill each pocket of the pallet with a high-quality potting mix, leaving enough space for the herb plants to be inserted.
Ensure that the soil is evenly distributed and gently pat it down to remove any air pockets. This will provide a stable and nutrient-rich environment for your herbs to thrive.
Step 4: Plant Your Herbs
It’s finally time to bring your herb garden to life! Choose your favorite herb plants or seeds and carefully insert them into the pockets of the pallet, ensuring that the roots are covered with soil.
Consider the growth habits and spacing requirements of each herb to ensure they have enough room to flourish. You can create a visually appealing arrangement by alternating different herbs throughout the pallet.
Step 5: Water and Care for Your Herb Garden
After planting your herbs, give them a good watering to help them settle into their new home. Be sure to water them regularly, keeping the soil moist but not waterlogged.
Monitor your herb garden for any signs of pests or diseases and take appropriate action to protect your plants. Regularly trim and harvest your herbs to encourage healthy growth and ensure a continuous supply of fresh flavors for your culinary creations.
Step 6: Enjoy the Fruits of Your Labor
Once your herbs have matured, it’s time to reap the rewards of your hard work. Step into your outdoor oasis and pluck fresh sprigs of basil, rosemary, thyme, or any other herb that tickles your taste buds.
Whether you’re adding a pinch of freshly chopped herbs to a pasta dish or infusing your favorite cocktail with aromatic flavors, your rustic pallet herb garden will be a constant source of inspiration and delight.
Conclusion
Creating a rustic pallet herb garden is not only a practical way to grow your own culinary herbs but also a creative and visually appealing addition to your outdoor space. By following the step-by-step instructions in this guide, you can transform a simple wooden pallet into a thriving herb garden that will enhance your cooking and bring joy to your senses.
So, roll up your sleeves, gather your materials, and embark on this DIY project that will not only satisfy your green thumb but also elevate your culinary adventures to new heights. Happy gardening!