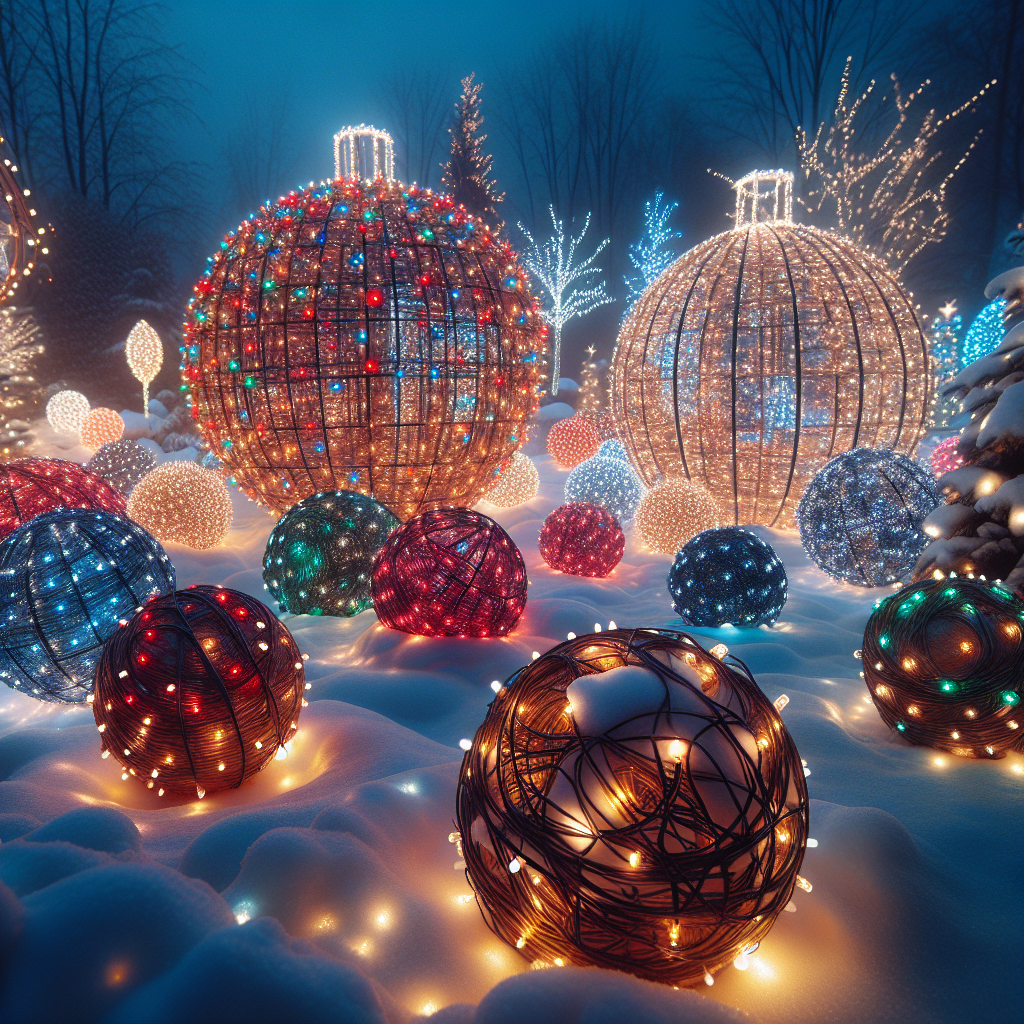
Light Up Your Yard with Handcrafted Christmas Light Balls for a Spectacular Festive Display
Are you looking to add a touch of magic to your yard this holiday season? Look no further than handcrafted Christmas light balls! These stunning decorations will transform your outdoor space into a winter wonderland, captivating both young and old. In this comprehensive guide, we will walk you through the step-by-step process of creating your own light balls, ensuring a spectacular festive display that will leave your neighbors in awe. So, let’s get started!
Materials Needed
- Chicken wire
- Wire cutters
- Gloves
- String lights
- Zip ties
- Outdoor extension cord
- Stakes or hooks
- Optional: Spray paint
Step 1: Gather Your Supplies
Before diving into the project, make sure you have all the necessary materials on hand. You can find chicken wire and string lights at your local hardware store or online. Choose string lights that are suitable for outdoor use and come in festive colors like red, green, and white. Additionally, consider purchasing spray paint if you want to add a pop of color to your light balls.
Step 2: Prepare the Chicken Wire
Put on your gloves to protect your hands from any sharp edges. Unroll the chicken wire and use wire cutters to cut a piece that is approximately 6 feet long. Carefully shape the wire into a ball, ensuring that the edges are securely fastened together. You can adjust the size of the ball by cutting the wire to your desired dimensions.
Step 3: Attach the String Lights
Now comes the fun part – adding the string lights! Start by unraveling the lights and carefully wrapping them around the chicken wire ball. Make sure to distribute the lights evenly, covering the entire surface of the ball. Use zip ties to secure the lights in place, ensuring they won’t come loose. Leave a long enough tail of lights to reach the power source.
Step 4: Connect to Power
Before placing your light balls in the yard, make sure you have an outdoor extension cord and a power source nearby. Connect the tail of lights to the extension cord, and then plug it into an outdoor outlet. If needed, use stakes or hooks to keep the extension cord off the ground and prevent any tripping hazards.
Step 5: Set Up Your Light Balls
Now that your light balls are ready to shine, it’s time to find the perfect spots in your yard to display them. Consider placing them along pathways, in trees, or even hanging them from your porch. Get creative and experiment with different arrangements to achieve the desired effect. Remember to secure the light balls using stakes or hooks to prevent them from rolling or falling over.
Step 6: Optional: Add a Splash of Color
If you want to take your light balls to the next level, consider adding a splash of color with spray paint. Choose colors that complement your existing outdoor decor or go for a bold and vibrant look. Before painting, make sure the lights are turned off and the chicken wire is dry. Apply the spray paint evenly, allowing each coat to dry before adding another layer. Once the paint is completely dry, you can turn the lights back on and enjoy the stunning visual impact.
Step 7: Sit Back and Enjoy the Magic
With your handcrafted Christmas light balls in place, it’s time to sit back, relax, and enjoy the magical ambiance they create. Invite friends and family over to marvel at your festive display, or simply take a moment to bask in the joy and wonder of the holiday season. Don’t forget to capture some photos to share with others and inspire them to embark on their own DIY projects.
Summary
Creating handcrafted Christmas light balls is a fantastic way to light up your yard and spread holiday cheer. With just a few materials and some creativity, you can transform your outdoor space into a dazzling spectacle that will leave everyone in awe. Remember to gather all the necessary supplies, prepare the chicken wire, attach the string lights, connect to power, set up your light balls, and optionally add a splash of color with spray paint. Once everything is in place, sit back and enjoy the magic of your handcrafted creations. Happy holidays!


