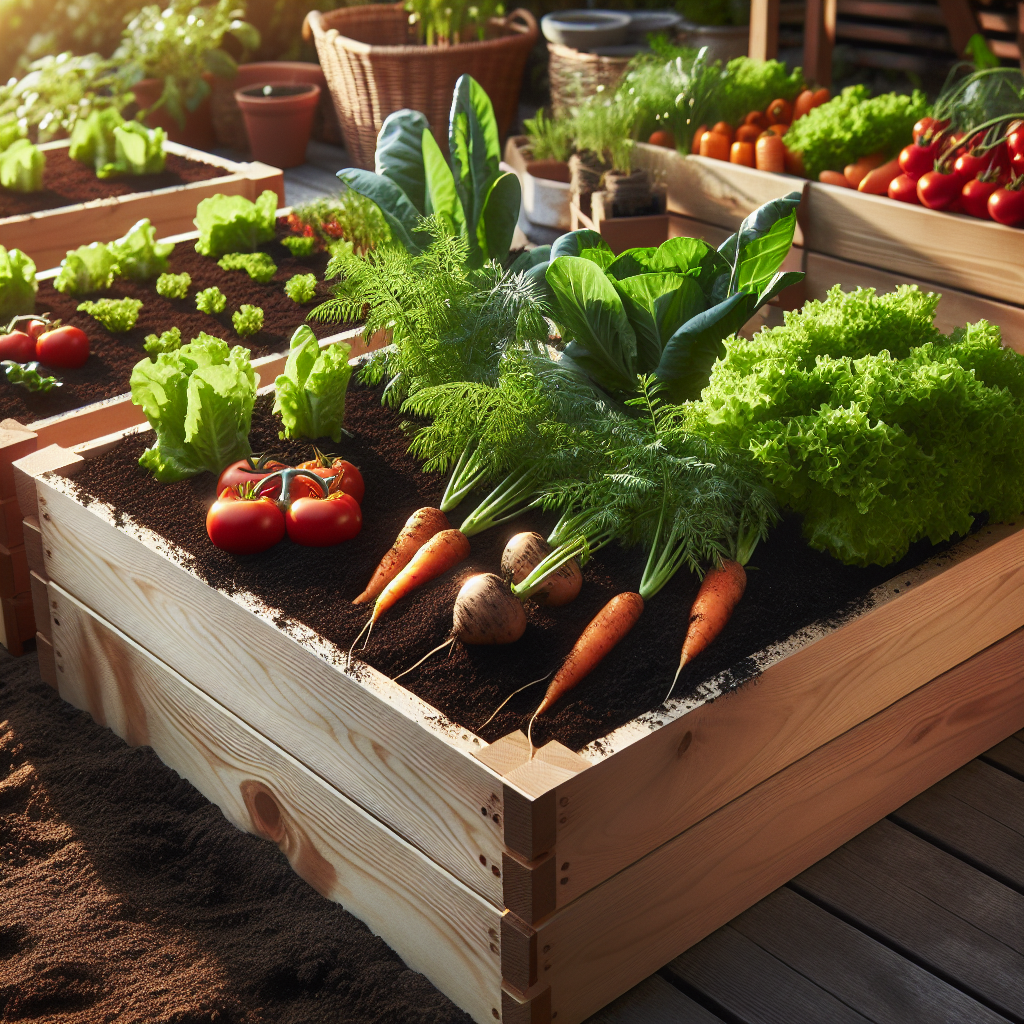
DIY Vegetable Garden Planter Boxes for Fresh Produce
Are you tired of buying expensive and often tasteless vegetables from the grocery store? Why not take matters into your own hands and create your very own vegetable garden planter boxes? Not only will you have access to fresh and delicious produce right in your backyard, but you’ll also have the satisfaction of growing your own food. In this comprehensive guide, we will walk you through the step-by-step process of building your own DIY vegetable garden planter boxes. Get ready to unleash your inner gardener and enjoy the bountiful harvest that awaits you!
Materials You’ll Need
Before we dive into the construction process, let’s gather all the necessary materials. Here’s what you’ll need:
- Wooden boards (cedar or redwood are recommended for their durability)
- Screws
- Drill
- Saw
- Measuring tape
- Level
- Landscape fabric
- Staple gun
- Soil
- Compost
- Vegetable seeds or seedlings
- Watering can or hose
Step 1: Determine the Size and Location
The first step in building your vegetable garden planter boxes is to determine the size and location. Consider the amount of space you have available and the amount of vegetables you want to grow. Ideally, each planter box should be no wider than 4 feet to ensure easy access to all plants. Additionally, choose a location that receives at least 6-8 hours of sunlight per day.
Step 2: Cut the Boards
Using a saw, cut the wooden boards to the desired length for your planter boxes. You will need four boards for each box – two for the sides and two for the ends. Make sure to measure and cut accurately to ensure a snug fit.
Step 3: Assemble the Box
Now it’s time to assemble the planter box. Lay out the boards on a flat surface, forming a rectangle. Use a drill and screws to attach the boards together at the corners. Make sure the box is sturdy and level.
Step 4: Add Drainage Holes
To prevent water from pooling in the bottom of the planter box, drill several drainage holes in the bottom board. This will ensure that your plants don’t become waterlogged and develop root rot.
Step 5: Line the Box with Landscape Fabric
Next, line the inside of the planter box with landscape fabric. This will help prevent weeds from growing and ensure proper drainage. Cut the fabric to fit the dimensions of the box and use a staple gun to secure it in place.
Step 6: Fill with Soil and Compost
Now it’s time to fill your planter box with soil and compost. Use a mixture of high-quality garden soil and compost to provide your plants with the nutrients they need to thrive. Fill the box almost to the top, leaving a few inches of space for watering.
Step 7: Plant Your Vegetables
Once your planter box is filled with soil, it’s time to plant your vegetables. Follow the instructions on the seed packets or plant labels for proper spacing and planting depth. Gently water the soil after planting to ensure good contact between the roots and the soil.
Step 8: Water and Maintain
Now that your vegetable garden planter boxes are complete, it’s important to water and maintain your plants regularly. Check the moisture level of the soil daily and water as needed. Keep an eye out for pests and diseases, and take appropriate action to protect your plants.
Step 9: Harvest and Enjoy
After weeks of nurturing and care, your vegetables will be ready for harvest. Pick them at their peak ripeness and enjoy the delicious flavors of your homegrown produce. There’s nothing quite like the taste of freshly picked vegetables!
Conclusion
Building your own DIY vegetable garden planter boxes is a rewarding and fulfilling project that allows you to grow your own fresh produce. By following the step-by-step instructions outlined in this guide, you’ll be well on your way to creating a thriving garden right in your backyard. So gather your materials, roll up your sleeves, and get ready to experience the joy of growing your own food. Happy gardening!