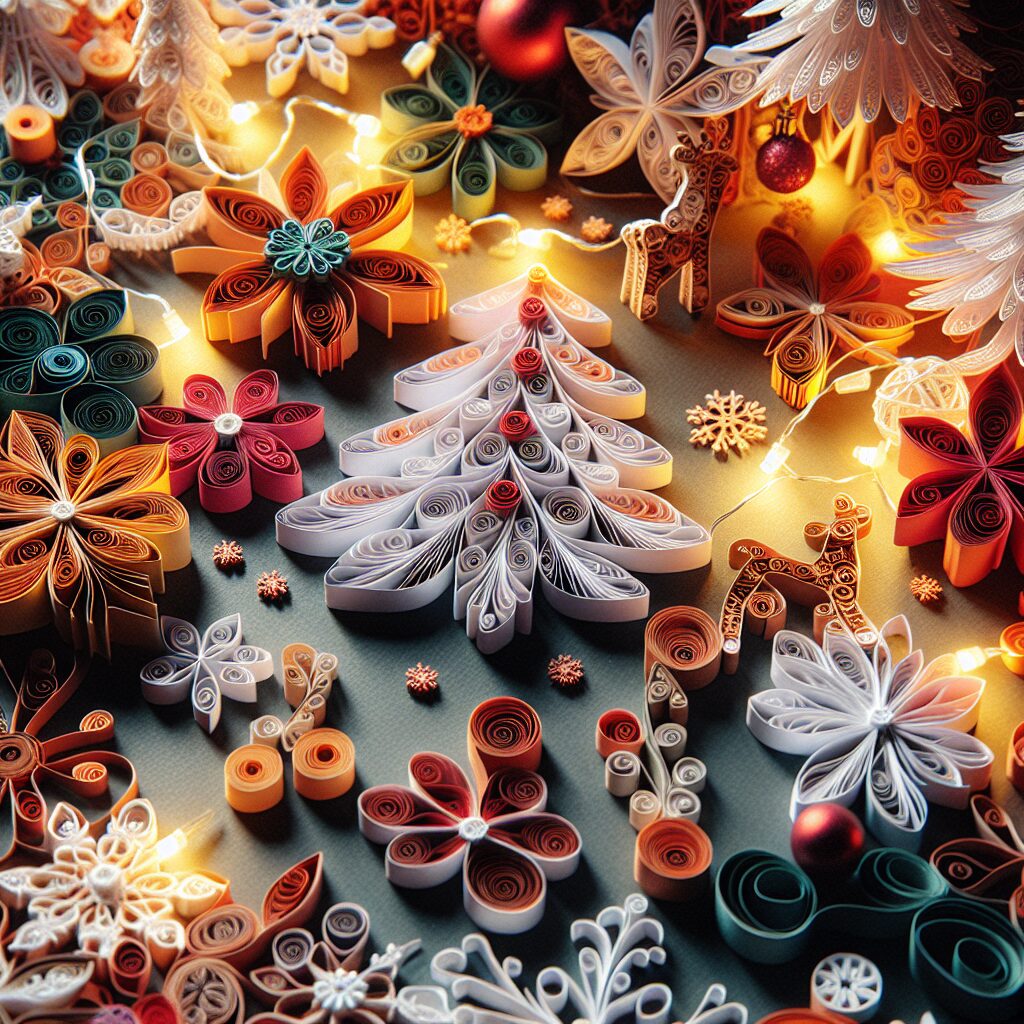
Christmas Paper Quilling Art: Create Intricate and Delicate Decorations
Christmas is a time of joy, celebration, and creativity. It’s the perfect opportunity to add a personal touch to your holiday decorations. If you’re looking for a unique and beautiful way to adorn your home this Christmas, why not try paper quilling? Paper quilling is an ancient art form that involves rolling and shaping strips of paper to create intricate designs. In this article, we will guide you through the process of making stunning Christmas paper quilling art that will impress your friends and family.
Materials Needed
Before we dive into the step-by-step instructions, let’s gather all the materials you’ll need for this project:
- Quilling paper strips in various colors
- Quilling tool or toothpick
- Glue
- Scissors
- Cardstock or thick paper for the base
- Decorative embellishments (optional)
Step 1: Choose Your Design
The first step in creating your Christmas paper quilling art is to decide on a design. You can choose from a wide range of Christmas-themed patterns such as snowflakes, Christmas trees, ornaments, and more. If you’re a beginner, start with a simple design and gradually work your way up to more complex ones. Once you’ve chosen your design, gather inspiration from online sources or create your own unique pattern.
Step 2: Prepare Your Paper Strips
Next, it’s time to prepare your paper strips. Cut the quilling paper into strips of equal length. The width of the strips can vary depending on the design you’ve chosen, but a width of 1/8 inch is a good starting point. You can experiment with different widths to achieve different effects. Make sure to have enough strips in various colors to bring your design to life.
Step 3: Start Quilling
Now comes the fun part – quilling! Take one of the paper strips and wrap it around the quilling tool or toothpick. Hold the end of the strip with your fingers to secure it in place. Gently slide the quilled paper off the tool and release your grip. You’ll be left with a tight coil. Apply a small amount of glue to the end of the strip to secure it.
Repeat this process with the remaining paper strips, creating coils of different sizes and colors. These coils will serve as the building blocks for your Christmas paper quilling art.
Step 4: Shape and Assemble
Once you have a collection of quilled coils, it’s time to shape and assemble them into your desired design. Use your fingers to gently shape the coils into various shapes such as teardrops, squares, or triangles. Experiment with different shapes to add depth and dimension to your artwork.
Apply a small amount of glue to the base paper or cardstock and start arranging the quilled coils on top. Use your design as a guide, placing the coils in the appropriate positions. You can also add decorative embellishments such as sequins, beads, or glitter to enhance the overall look of your artwork.
Step 5: Finishing Touches
Once you’re satisfied with the arrangement of your quilled coils, it’s time for the finishing touches. Trim any excess paper strips that may be sticking out. Make sure all the coils are securely glued in place. Allow the artwork to dry completely before handling it.
Step 6: Display and Enjoy
Now that your Christmas paper quilling art is complete, it’s time to display and enjoy your masterpiece. Frame it and hang it on a wall, use it as a centerpiece for your holiday table, or give it as a thoughtful handmade gift to a loved one. The possibilities are endless!
Conclusion
Paper quilling is a versatile and rewarding art form that allows you to create intricate and delicate Christmas decorations. By following the step-by-step instructions in this article, you can unleash your creativity and make stunning paper quilling art that will impress everyone who sees it. Remember to gather all the necessary materials, choose a design, prepare your paper strips, start quilling, shape and assemble, add finishing touches, and finally, display and enjoy your artwork. Have fun and let your imagination soar this Christmas!


