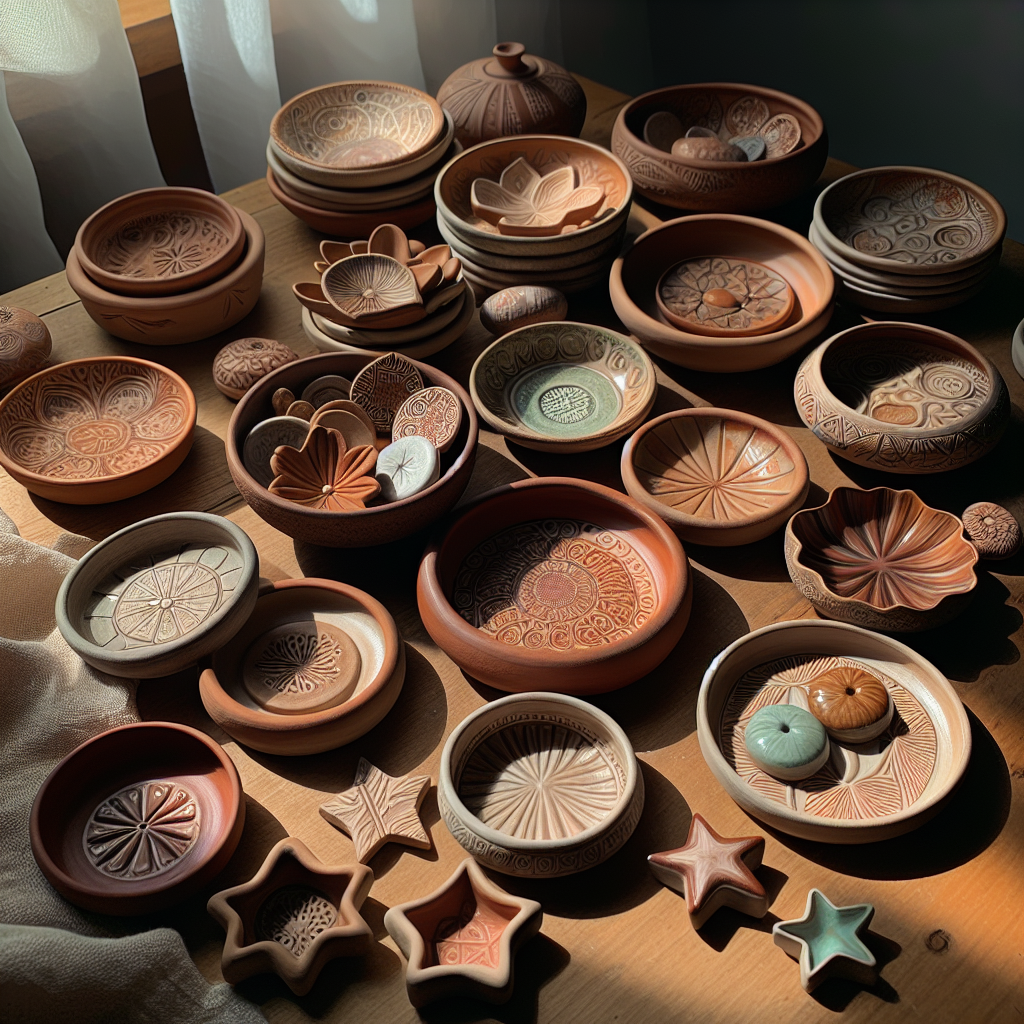
DIY Clay Jewelry Dishes: Create Beautiful and Functional Pieces
Are you looking for a creative and practical project to showcase your jewelry collection? Look no further! In this step-by-step guide, we will teach you how to make stunning clay jewelry dishes that are not only beautiful but also functional. These handmade dishes will keep your precious jewelry organized and easily accessible, while adding a touch of elegance to your space. So, let’s get started on this exciting DIY journey!
Materials You Will Need
- Polymer clay (in various colors)
- Rolling pin
- Clay cutting tools
- Oven-safe dish or bowl (for shaping)
- Baking sheet
- Oven
- Sandpaper (fine-grit)
- Acrylic paint (optional)
- Paintbrushes (optional)
- Clear varnish or glaze (optional)
Step 1: Prepare Your Workspace
Before diving into the creative process, it’s important to set up a clean and organized workspace. Clear a table or countertop and gather all the necessary materials. Make sure you have enough space to comfortably work with the clay and other tools.
Step 2: Choose Your Clay Colors
One of the most exciting aspects of this project is selecting the colors for your clay jewelry dishes. Polymer clay comes in a wide range of vibrant hues, allowing you to unleash your creativity. Consider choosing colors that complement your jewelry collection or match your room’s decor.
Step 3: Condition the Clay
Before you can start shaping the clay, it needs to be conditioned. Conditioning involves softening the clay by kneading it with your hands. This process makes the clay more pliable and easier to work with. Take a small piece of clay and knead it until it becomes smooth and malleable.
Step 4: Roll Out the Clay
Using a rolling pin, roll out the conditioned clay to a thickness of about 1/4 inch. Make sure the clay is evenly rolled out to ensure consistent results. If you prefer thinner or thicker dishes, adjust the thickness accordingly.
Step 5: Shape the Clay
Now comes the fun part – shaping the clay into beautiful jewelry dishes! Place an oven-safe dish or bowl upside down on the rolled-out clay. Gently press the clay around the dish, shaping it to match the contours of the dish. Trim off any excess clay using clay cutting tools.
Step 6: Bake the Clay
Preheat your oven according to the instructions on the polymer clay packaging. Carefully transfer the shaped clay onto a baking sheet and place it in the preheated oven. Bake the clay for the recommended time and temperature specified on the packaging. Be sure to monitor the clay while it bakes to prevent any burning or discoloration.
Step 7: Sand and Smooth the Clay
Once the clay has cooled down, gently sand the edges and surfaces using fine-grit sandpaper. This step helps to smooth out any rough edges or imperfections, giving your jewelry dishes a professional finish. Take your time and be gentle to avoid damaging the clay.
Step 8: Add Personal Touches (Optional)
If you want to add a personal touch to your clay jewelry dishes, now is the time to get creative! You can paint the dishes using acrylic paint, adding intricate designs or patterns. Alternatively, you can leave them as they are for a minimalist look. Once you’re satisfied with the design, let the paint dry completely.
Step 9: Apply Varnish or Glaze (Optional)
To protect the paint and give your jewelry dishes a glossy finish, you can apply a clear varnish or glaze. This step is optional but highly recommended if you want your dishes to have a polished and professional appearance. Follow the instructions on the varnish or glaze packaging for the best results.
Step 10: Enjoy Your Handmade Jewelry Dishes
After all your hard work and creativity, it’s time to enjoy the fruits of your labor! Place your jewelry in the clay dishes and proudly display them on your dresser, vanity, or bathroom counter. Admire the beauty and functionality of your handmade creations every time you reach for your favorite necklace or pair of earrings.
Conclusion
Creating your own clay jewelry dishes is a rewarding and enjoyable DIY project. With just a few materials and some creativity, you can make stunning pieces that reflect your personal style. These dishes not only keep your jewelry organized but also add a touch of elegance to your space. So, gather your supplies, follow the step-by-step instructions, and let your imagination run wild. Get ready to impress yourself and others with your beautiful and functional clay jewelry dishes!


