DIY Ladder Shelf for Storage: A Step-by-Step Guide
Are you tired of cluttered spaces and looking for a stylish and functional storage solution? Look no further! In this comprehensive guide, we will walk you through the process of creating your very own DIY ladder shelf for storage. With just a few materials and some basic tools, you can transform any room in your home into an organized oasis. So, roll up your sleeves and let’s get started!
Materials You’ll Need
- 4 wooden boards (2x4x8 feet)
- 2 wooden boards (1x4x8 feet)
- 1 wooden board (1x12x8 feet)
- Wood glue
- Wood screws
- Sandpaper
- Paint or stain
- Paintbrush or foam roller
- Saw
- Drill
- Measuring tape
- Pencil
- Safety goggles
Step 1: Measure and Cut the Wooden Boards
Start by measuring and cutting the wooden boards according to the desired dimensions of your ladder shelf. Here’s a breakdown of the measurements:
- 2×4 boards: Cut 4 pieces to your desired height for the ladder sides.
- 1×4 boards: Cut 4 pieces to the same length as the 2×4 boards for the ladder rungs.
- 1×12 board: Cut 5 pieces to your desired width for the shelves.
Remember to wear safety goggles and use caution when operating the saw.
Step 2: Sand the Boards
Once you have cut all the boards, use sandpaper to smooth out any rough edges or surfaces. This will ensure a clean and polished look for your ladder shelf.
Step 3: Assemble the Ladder Sides
Take two of the 2×4 boards and lay them parallel to each other, with the narrower sides facing inward. Position the ladder rungs (1×4 boards) evenly between the sides, leaving enough space for the shelves. Use wood glue and screws to secure the rungs in place. Repeat this process for the other side of the ladder.
Step 4: Attach the Shelves
Place the ladder sides on a flat surface, with the rungs facing upward. Take the 1×12 boards and position them horizontally across the rungs, evenly spacing them to create the shelves. Use wood glue and screws to attach the shelves to the ladder sides.
Step 5: Finishing Touches
Now that the basic structure of your ladder shelf is complete, it’s time to add some finishing touches. Sand any rough areas and wipe away any dust. Then, choose a paint or stain color that complements your existing decor. Apply the paint or stain using a paintbrush or foam roller, following the manufacturer’s instructions. Allow the shelves to dry completely before moving on to the next step.
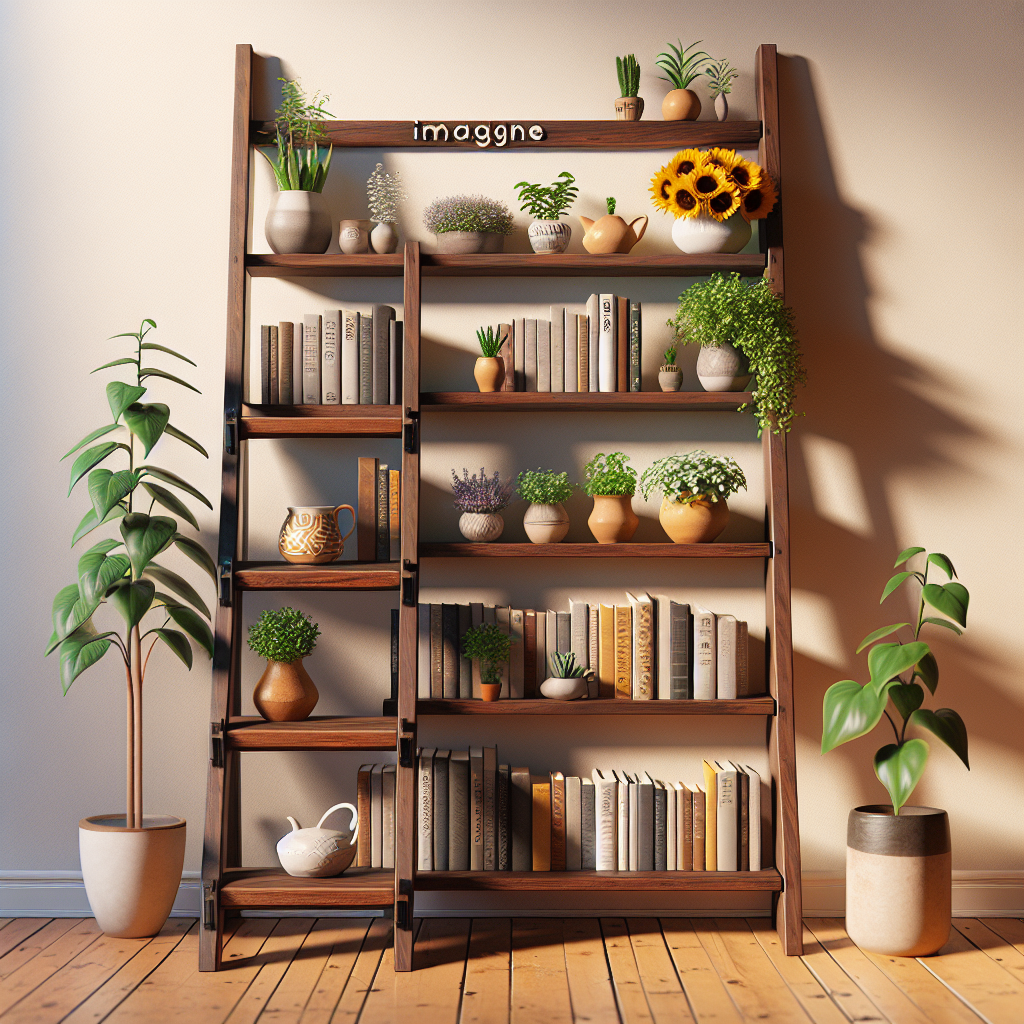
Step 6: Arrange and Decorate
Once the paint or stain has dried, it’s time to arrange your ladder shelf and start organizing your belongings. Place it against a wall or in a corner, and start filling the shelves with books, plants, decorative items, or whatever you desire. Get creative and make it your own!
Step 7: Admire Your Handiwork
Stand back and admire your beautiful DIY ladder shelf for storage. Not only have you created a functional storage solution, but you’ve also added a stylish piece of furniture to your home. Take a moment to appreciate your hard work and enjoy the organized space you’ve created.
Estimated Time and Final Thoughts
The time it takes to complete this DIY ladder shelf project will vary depending on your skill level and the tools you have available. On average, it can take anywhere from 4 to 8 hours to complete.
Remember, safety should always be a top priority when working on any DIY project. Wear protective gear, such as safety goggles, and use caution when operating tools.
Creating your own ladder shelf for storage is not only a practical solution but also a rewarding experience. By following these step-by-step instructions, you can transform a few pieces of wood into a functional and stylish piece of furniture. So, gather your materials, unleash your creativity, and get ready to enjoy a clutter-free space!


