DIY Wooden Spice Rack: A Step-by-Step Guide to Creating Your Own
Are you tired of rummaging through your kitchen cabinets, searching for that one spice you need? Do you dream of having a beautifully organized spice collection, neatly displayed and easily accessible? Look no further! In this comprehensive guide, we will walk you through the process of creating your very own DIY wooden spice rack. With just a few materials and some basic woodworking skills, you can transform your kitchen into a culinary paradise. So roll up your sleeves, grab your tools, and let’s get started!
Materials You Will Need
- Wooden boards (preferably hardwood)
- Saw
- Sandpaper (various grits)
- Wood glue
- Clamps
- Nails or screws
- Drill
- Measuring tape
- Pencil
- Paint or stain (optional)
- Paintbrush or foam brush (if painting or staining)
- Clear coat or varnish (optional)
- Spice jars or containers
- Labels
Step 1: Planning and Design
Before you start cutting any wood, it’s important to plan and design your spice rack. Consider the available space in your kitchen and how many spices you want to store. Sketch out a rough design, taking into account the dimensions of your spice jars or containers. This will help you determine the size and shape of your spice rack.
Once you have a design in mind, measure and mark the dimensions on your wooden boards. Use a measuring tape and pencil to ensure accuracy.
Step 2: Cutting the Wood
Now it’s time to cut the wooden boards according to your measurements. Use a saw to carefully cut along the marked lines. Take your time and make precise cuts to ensure that all the pieces fit together properly.
Remember to wear safety goggles and gloves while using the saw to protect yourself from any potential accidents.
Step 3: Sanding the Wood
Once you have cut all the pieces, it’s important to sand them to create a smooth and polished finish. Start with a coarse-grit sandpaper to remove any rough edges or splinters. Then gradually move to finer-grit sandpaper to achieve a silky-smooth surface.
Be sure to sand both the front and back surfaces of each piece, as well as the edges. This will ensure that your spice rack looks professional and feels pleasant to the touch.
Step 4: Assembling the Spice Rack
Now it’s time to put all the pieces together and assemble your spice rack. Apply wood glue to the edges of the boards and use clamps to hold them in place while the glue dries. Make sure the pieces are aligned properly and use a measuring tape to double-check the dimensions.
Once the glue has dried, reinforce the joints with nails or screws for added stability. Use a drill to create pilot holes before inserting the nails or screws to prevent the wood from splitting.
Step 5: Finishing Touches
Now that your spice rack is assembled, it’s time to add some finishing touches. If you prefer a natural wood look, you can skip this step. However, if you want to add some color or protection, you can paint or stain your spice rack.
If you choose to paint, apply a thin and even coat of paint using a paintbrush or foam brush. Allow the paint to dry completely before applying additional coats. If you prefer a stained finish, use a clean cloth to apply the stain in the direction of the wood grain. Wipe off any excess stain and allow it to dry.
Once the paint or stain has dried, you can apply a clear coat or varnish to protect the wood and give it a glossy finish. Follow the manufacturer’s instructions for application and drying times.
Step 6: Organizing Your Spices
Now that your spice rack is complete, it’s time to organize your spices. Transfer your spices into matching jars or containers for a cohesive look. You can find a variety of spice jars and containers online or at your local kitchen supply store.
Label each jar or container with the name of the spice using adhesive labels or a label maker. This will make it easy to find the spice you need when cooking.
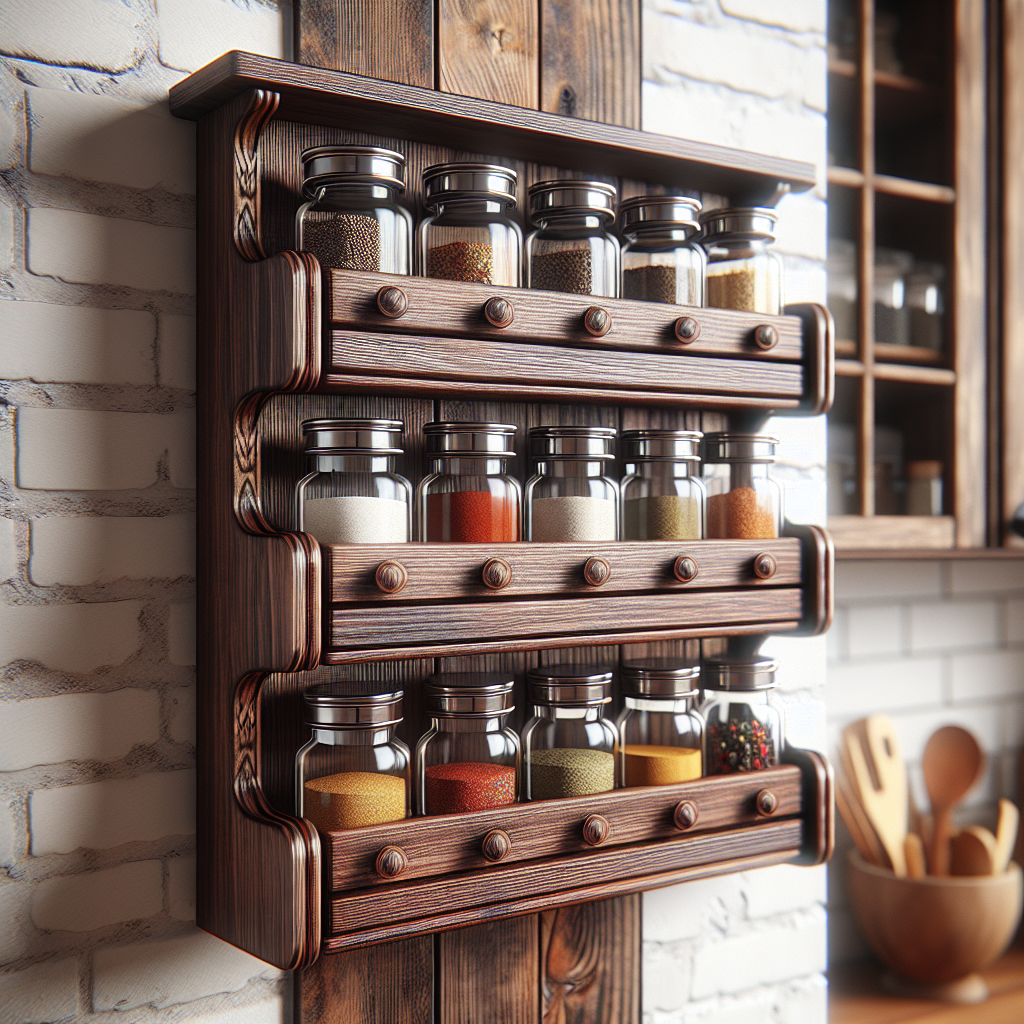
Step 7: Displaying Your Spice Rack
Finally, it’s time to display your beautiful DIY wooden spice rack in your kitchen. Find a suitable location, such as a wall or countertop, where it is easily accessible while cooking.
You can mount the spice rack on the wall using screws or hooks, or simply place it on a countertop. Arrange the spice jars or containers in a way that is visually appealing and functional.
Conclusion
Congratulations! You have successfully created your own DIY wooden spice rack. Not only does it provide a practical solution for organizing your spices, but it also adds a touch of elegance to your kitchen. Now you can easily find and access your favorite spices while cooking, making your culinary adventures even more enjoyable.
Remember, this project can be customized to fit your specific needs and preferences. Feel free to experiment with different wood types, finishes, and designs to create a spice rack that reflects your personal style.
So go ahead, gather your materials, and embark on this exciting DIY journey. Your beautifully organized spice collection awaits!


