Homemade Lip Balm: A Step-by-Step Guide to Creating Your Own Natural Lip Care
Are you tired of spending money on expensive lip balms that contain harmful chemicals and artificial ingredients? Why not try making your own homemade lip balm? Not only is it a fun and creative project, but it also allows you to control the ingredients and customize the scent and flavor to your liking. In this comprehensive guide, we will walk you through the step-by-step process of creating your very own natural lip care products. Get ready to indulge in the world of DIY beauty!
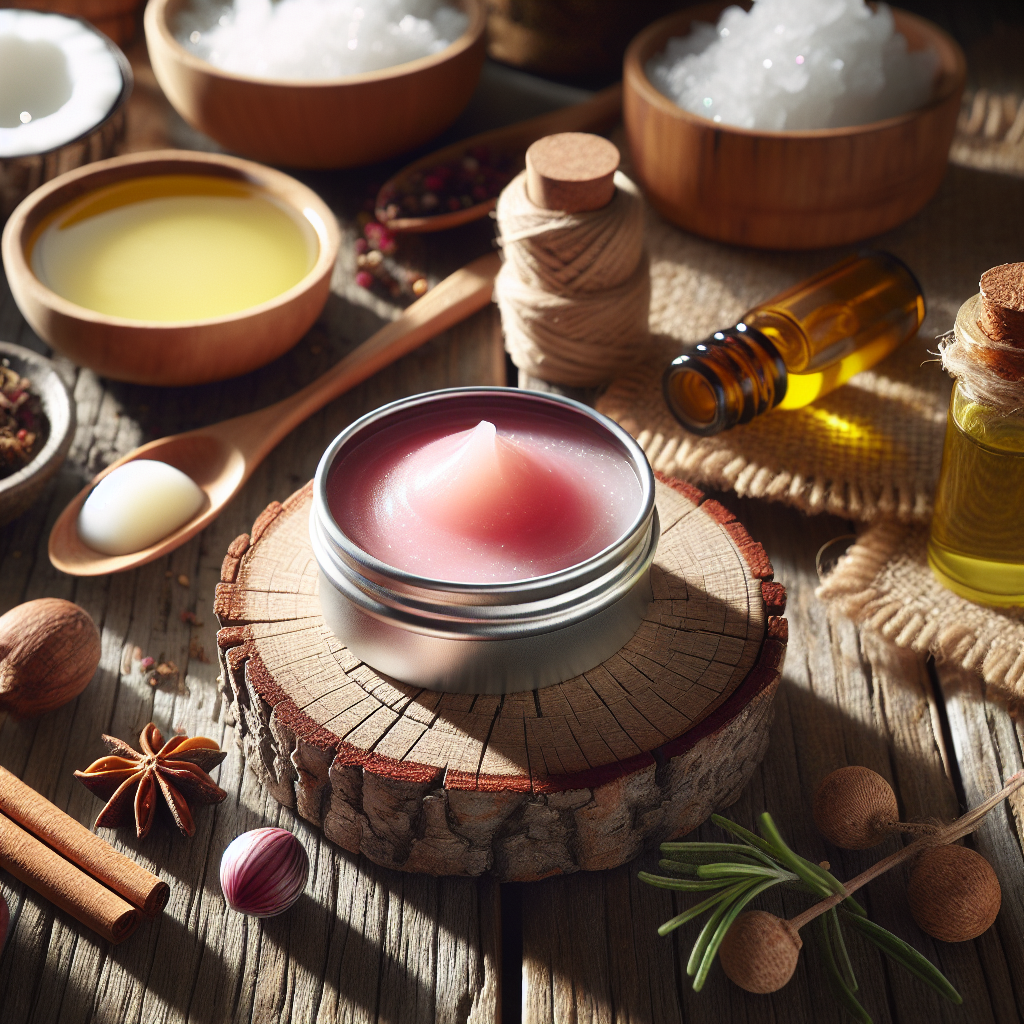
Materials You’ll Need
Before we dive into the exciting process of making homemade lip balm, let’s gather all the necessary materials. Here’s a list of items you’ll need:
- Beeswax pellets
- Coconut oil
- Shea butter
- Essential oils (such as lavender, peppermint, or citrus)
- Lip balm tubes or small containers
- Double boiler or microwave-safe bowl
- Stirring utensil (such as a spoon or spatula)
- Measuring cups or scale
- Pipettes or droppers
- Labels or stickers for packaging
Step 1: Prepare Your Workstation
Before you begin, it’s important to set up a clean and organized workspace. Make sure all your materials and tools are easily accessible. Cleanse your work area and sanitize your equipment to ensure a hygienic process.
Step 2: Measure and Melt the Ingredients
Now it’s time to measure and melt the ingredients for your homemade lip balm. Follow these steps:
- Measure 1 tablespoon of beeswax pellets, 1 tablespoon of coconut oil, and 1 tablespoon of shea butter.
- Place the measured ingredients in a double boiler or a microwave-safe bowl.
- If using a double boiler, heat the water in the bottom pot and allow the ingredients to melt gently. If using a microwave, heat the bowl in short intervals, stirring in between, until the ingredients are fully melted.
Step 3: Add Your Desired Essential Oils
Once the ingredients are fully melted, it’s time to add your favorite essential oils for a delightful scent and flavor. Here’s how:
- Using a pipette or dropper, add 10-15 drops of your chosen essential oil to the melted mixture.
- Stir well to ensure the oils are evenly distributed.
Step 4: Pour the Mixture into Containers
Now that your lip balm mixture is ready, it’s time to pour it into your chosen containers. Follow these steps:
- Carefully pour the melted mixture into lip balm tubes or small containers.
- Fill each container to the top, leaving a small space for the lip balm to solidify.
- Allow the lip balm to cool and solidify completely before moving on to the next step.
Step 5: Label and Decorate Your Lip Balm
Now that your homemade lip balm has solidified, it’s time to add a personal touch. Follow these steps to label and decorate your lip balm:
- Create labels or stickers with the name of your lip balm and the ingredients used.
- Apply the labels to the containers, ensuring they are secure and legible.
- If desired, decorate the containers with ribbons, washi tape, or any other decorative elements.
Step 6: Enjoy Your Homemade Lip Balm
Congratulations! You have successfully created your very own homemade lip balm. Now it’s time to enjoy the fruits of your labor. Apply your lip balm whenever your lips need some extra care and hydration. Not only will it keep your lips soft and moisturized, but it will also give you a sense of pride knowing that you made it yourself.
Summary
Making your own homemade lip balm is a rewarding and enjoyable DIY project. By following the step-by-step instructions in this guide, you can create a natural and personalized lip care product that is free from harmful chemicals. Remember to gather all the necessary materials, measure and melt the ingredients, add your desired essential oils, pour the mixture into containers, label and decorate your lip balm, and finally, enjoy the results of your hard work. Get ready to pamper your lips with a touch of DIY luxury!


