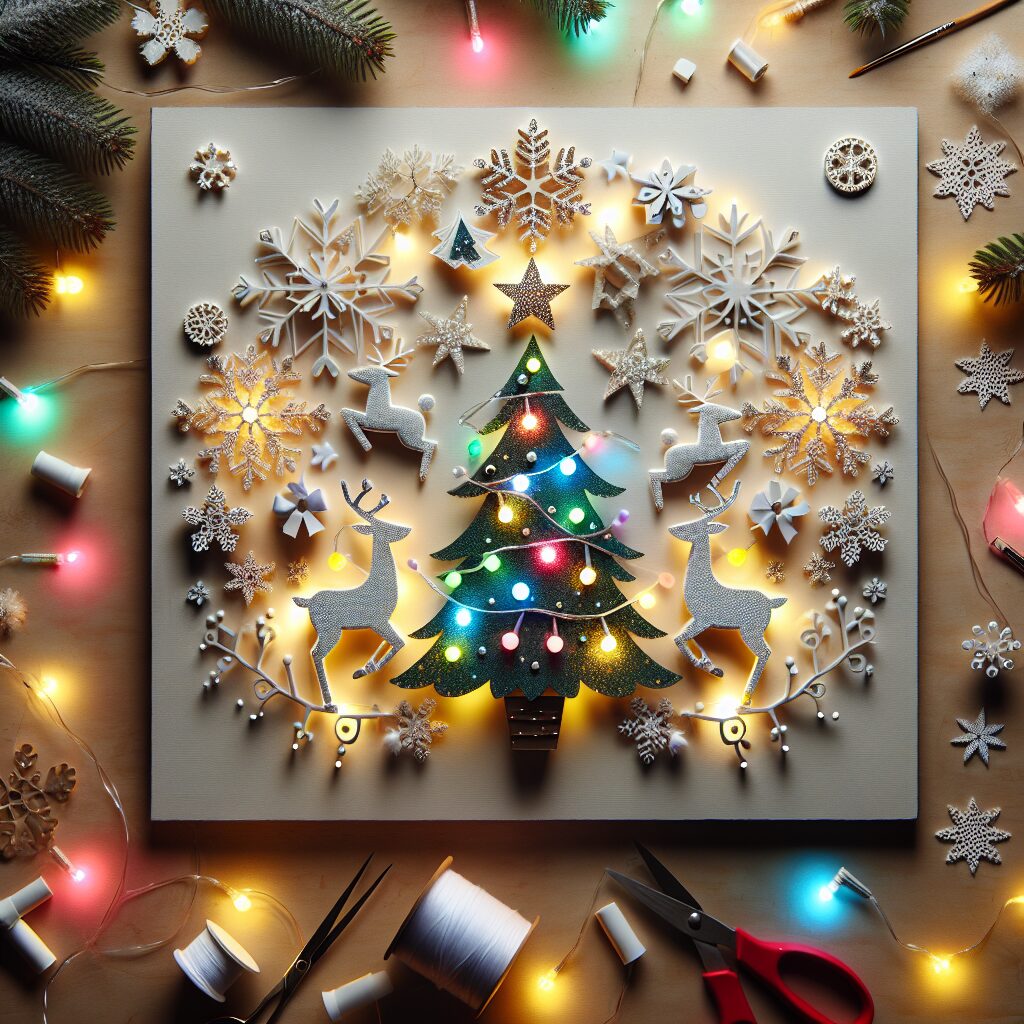
LED Christmas Light Up Art: Incorporate LED lights into your crafts for a glowing holiday effect
Are you looking to add a touch of magic to your holiday decorations this year? LED Christmas light up art is the perfect way to create a glowing and festive atmosphere in your home. With just a few simple materials and some creativity, you can transform ordinary crafts into stunning pieces that will impress your friends and family. In this article, we will guide you through the process of incorporating LED lights into your holiday crafts, providing step-by-step instructions and valuable insights along the way. Get ready to bring some sparkle to your Christmas decorations!
Materials Needed
Before we dive into the project, let’s gather all the materials you’ll need:
- LED lights (choose a color that complements your holiday theme)
- Craft paper or canvas
- Scissors
- Glue or tape
- Markers or colored pencils
- Optional: stencils or templates
Once you have gathered all the materials, set aside some time to complete this project. Depending on the complexity of your design, it may take anywhere from a few hours to a couple of days.
Step 1: Plan Your Design
The first step in creating your LED Christmas light up art is to plan your design. Think about the theme you want to convey and the overall look you want to achieve. Will it be a traditional Christmas scene, a winter wonderland, or something completely unique? Sketch out your ideas on a piece of paper to get a better sense of how the final product will look.
Remember to consider the size of your craft paper or canvas when planning your design. You want to make sure it will fit nicely within the available space.
Step 2: Cut Out Your Design
Once you have a clear plan in mind, it’s time to bring your design to life. Take your craft paper or canvas and carefully cut out the shapes and elements that will make up your artwork. If you’re using stencils or templates, trace them onto the paper before cutting.
Take your time during this step to ensure clean and precise cuts. The more attention to detail you put into this process, the better your final piece will look.
Step 3: Add LED Lights
Now comes the fun part – adding the LED lights to your artwork. Start by placing the lights on the backside of your cut-out design. Use tape or glue to secure them in place, making sure the bulbs are visible through the front of the paper.
If you’re working with a larger piece, you may need to use multiple strands of LED lights. In that case, make sure to connect them properly and distribute them evenly across your design.
Step 4: Secure the Lights
Once you have positioned the LED lights, it’s important to secure them properly to ensure they stay in place. Use tape or glue to attach the wires to the backside of your craft paper or canvas. This will prevent the lights from shifting or falling out of place.
Be careful not to cover the bulbs with tape or glue, as this will dim their glow. You want the lights to shine brightly through your artwork.
Step 5: Enhance Your Design
Now that your LED lights are securely in place, it’s time to enhance your design further. Use markers or colored pencils to add details, shading, or any additional elements you desire. This step will bring depth and dimension to your artwork, making it even more visually appealing.
Feel free to get creative and experiment with different techniques. You can use metallic markers for a touch of sparkle or blend colors together for a gradient effect. The possibilities are endless!
Step 6: Test and Adjust
Before displaying your LED Christmas light up art, it’s essential to test the lights and make any necessary adjustments. Plug in the lights and ensure that all bulbs are working properly. If you notice any issues, such as flickering or dimming lights, double-check the connections and secure them again if needed.
Take this opportunity to step back and evaluate your artwork as a whole. Are there any areas that could use more lights or additional details? Make any final adjustments to ensure your creation looks exactly how you envisioned it.
Step 7: Display and Enjoy
Now that your LED Christmas light up art is complete, it’s time to display it proudly in your home. Find a suitable spot where it can be admired by all, whether it’s on a wall, mantel, or as a centerpiece on your holiday table.
When positioning your artwork, consider the placement of the LED lights. Make sure they are visible and not obstructed by other objects. You want their warm glow to shine brightly and create a magical ambiance.
Conclusion
Congratulations! You have successfully created your own LED Christmas light up art. By incorporating LED lights into your crafts, you have added a touch of enchantment to your holiday decorations. The process may have required some time and effort, but the end result is undoubtedly worth it.
Remember, this project is just the beginning. Let your imagination run wild and explore different designs and techniques. LED lights can be incorporated into various crafts, from ornaments and wreaths to greeting cards and gift tags. The possibilities are endless, and the joy of creating something unique and beautiful is truly priceless.
So go ahead, gather your materials, and let your creativity shine. Get ready to illuminate your holiday season with stunning LED Christmas light up art!


