Painted Rock Garden Markers: A Step-by-Step Guide
Are you looking for a fun and creative way to label your garden plants? Look no further than painted rock garden markers! This simple and inexpensive DIY project allows you to add a personal touch to your garden while also helping you keep track of your plants. In this article, we will guide you through the process of creating your own painted rock garden markers, from gathering the materials to adding the finishing touches. Let’s get started!
Materials You’ll Need
- Smooth rocks
- Acrylic paint
- Paintbrushes
- Waterproof sealant
- Permanent markers
- Pencil
- Clear varnish (optional)
Step 1: Collecting Rocks
The first step in creating your painted rock garden markers is to find the perfect rocks. Look for smooth rocks that are large enough to write on but small enough to fit in your garden. You can find rocks in your own backyard, at a local park, or even purchase them from a garden supply store. Make sure to clean the rocks thoroughly and let them dry before moving on to the next step.
Step 2: Planning Your Designs
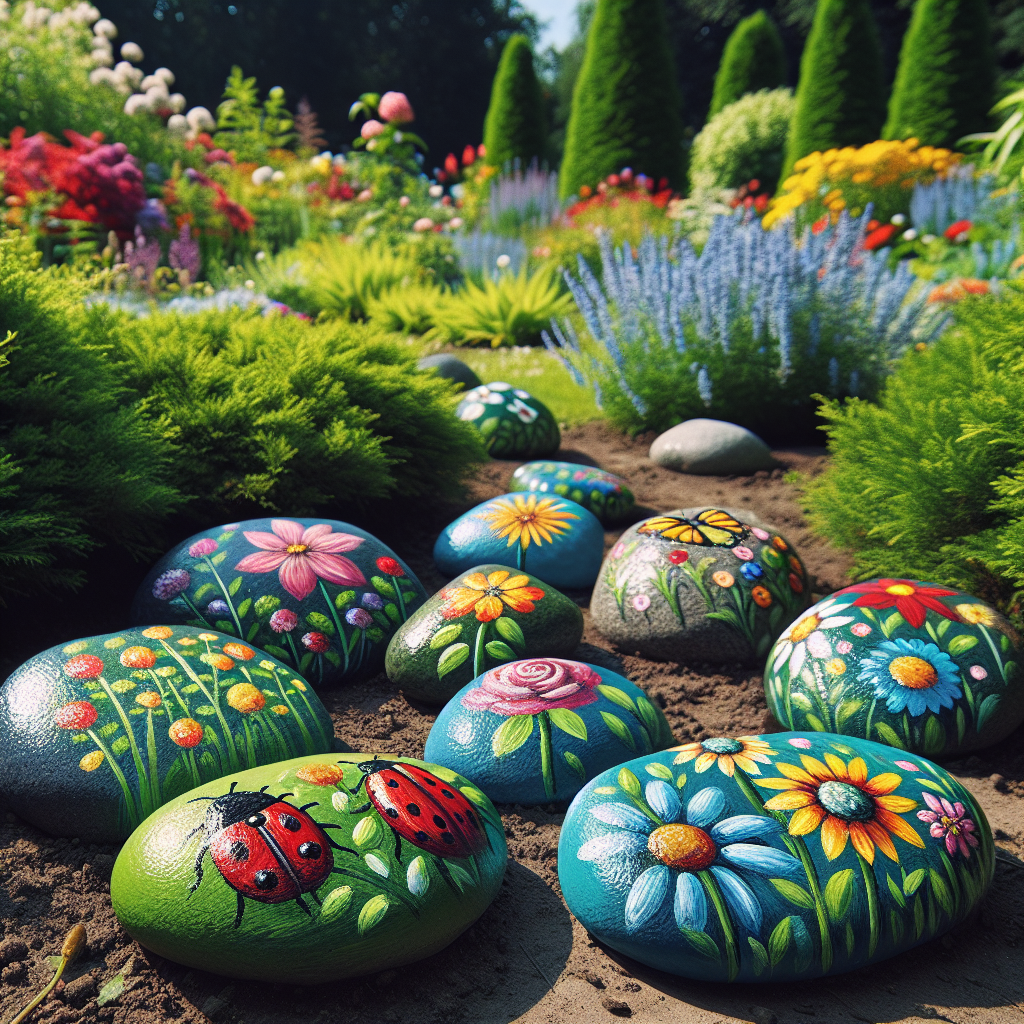
Before you start painting, it’s a good idea to plan out your designs. Use a pencil to lightly sketch your desired designs on the rocks. You can choose to paint the entire rock or leave some areas unpainted for a more natural look. Consider using different colors and patterns to make each marker unique and easily identifiable.
Step 3: Painting the Rocks
Now it’s time to bring your designs to life! Using acrylic paint and a paintbrush, carefully fill in the sketched areas on the rocks. You may need to apply multiple coats of paint to achieve the desired opacity. Allow each coat to dry completely before applying the next one. Don’t forget to paint the sides and back of the rocks as well for a finished look.
Step 4: Adding Details
Once the base coat is dry, you can add additional details to your painted rock garden markers. Use permanent markers to write the names of your plants or draw small illustrations that represent each plant. This step allows you to personalize your markers and make them even more visually appealing.
Step 5: Sealing the Rocks
To ensure that your painted rock garden markers withstand the elements, it’s important to seal them with a waterproof sealant. Apply a thin layer of sealant over the painted surface of each rock, making sure to cover all areas. This will protect the paint from fading or peeling due to rain or sunlight. If desired, you can also apply a clear varnish for added protection and shine.
Step 6: Placing the Markers
Once the sealant is dry, your painted rock garden markers are ready to be placed in your garden. Choose a spot near each plant and gently press the markers into the soil, making sure they are secure. The markers will not only help you identify your plants but also add a decorative element to your garden.
Step 7: Maintaining Your Markers
To keep your painted rock garden markers looking their best, it’s important to maintain them regularly. Check for any signs of wear or damage, such as chipped paint or fading, and touch up as needed. If necessary, reapply the waterproof sealant to ensure the longevity of your markers.
Conclusion
Creating your own painted rock garden markers is a fun and rewarding DIY project that allows you to add a personal touch to your garden. By following the step-by-step guide outlined in this article, you can easily create beautiful and functional markers that will help you keep track of your plants. So gather your materials, unleash your creativity, and get ready to transform your garden with these unique and eye-catching markers!


