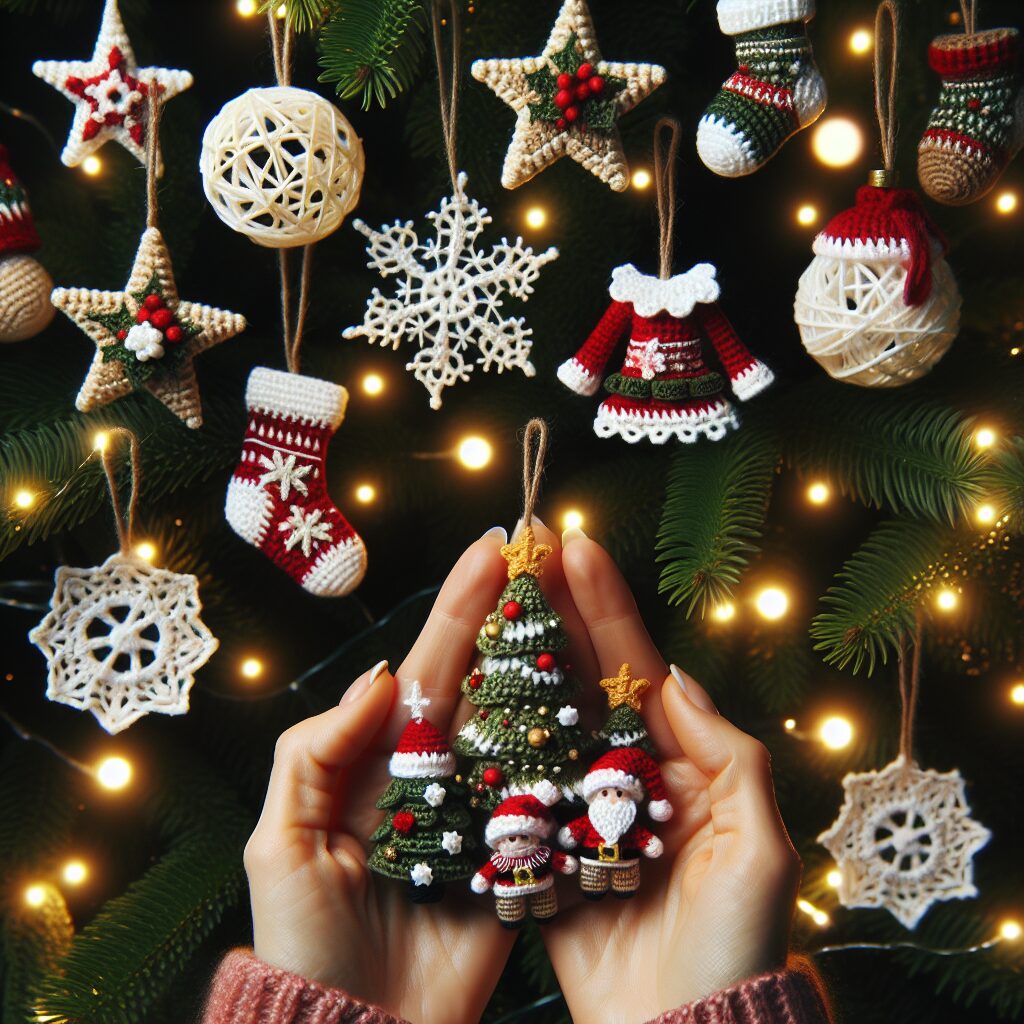
Crochet Christmas Tree Decorations: Crochet Unique Decorations for Your Christmas Tree
Christmas is a time of joy, love, and creativity. It’s a time when we gather with our loved ones and decorate our homes with beautiful ornaments. If you’re looking to add a personal touch to your Christmas tree this year, why not try crocheting your own decorations? Crochet Christmas tree decorations are not only unique and charming, but they also make for a fun and rewarding DIY project. In this article, we will guide you through the process of creating your very own crochet Christmas tree decorations, step by step.
Materials You’ll Need
Before we dive into the instructions, let’s gather all the materials you’ll need for this project:
- Crochet hooks (sizes G, H, and I)
- Yarn in various colors (green, red, white, gold, silver, etc.)
- Scissors
- Tapestry needle
- Stuffing or fiberfill
- Optional: beads, sequins, or other embellishments
Step-by-Step Instructions
Now that you have all your materials ready, let’s get started on creating your crochet Christmas tree decorations:
Step 1: Choose a Pattern
There are countless crochet patterns available for Christmas tree decorations. You can find patterns for mini stockings, snowflakes, stars, angels, and more. Choose a pattern that speaks to you and matches your desired theme for your Christmas tree.
Step 2: Gather the Right Yarn
Once you’ve chosen a pattern, gather the appropriate yarn colors. If you’re making a Christmas tree, you’ll need green yarn for the body and brown yarn for the trunk. If you’re making snowflakes or stars, opt for white or silver yarn. Be creative and mix and match colors to make your decorations truly unique.
Step 3: Start Crocheting
Now it’s time to pick up your crochet hook and start crocheting. Follow the pattern instructions carefully, paying attention to stitch counts and any special techniques required. If you’re new to crochet, don’t worry! There are plenty of beginner-friendly patterns available that will guide you through the process.
Remember to take breaks and stretch your hands and fingers to avoid any strain or discomfort. Crocheting should be a relaxing and enjoyable experience.
Step 4: Add Embellishments (Optional)
If you want to add some extra sparkle to your crochet Christmas tree decorations, consider adding embellishments such as beads, sequins, or ribbons. You can sew them onto your decorations using a tapestry needle and matching thread. Be creative and let your imagination run wild!
Step 5: Stuff and Finish
Once you’ve completed crocheting your decorations, it’s time to stuff them with fiberfill or stuffing. This will give them a three-dimensional shape and make them look more like traditional ornaments. Use a tapestry needle to carefully sew up any openings and secure the stuffing inside.
Step 6: Attach Hanging Loops
To hang your crochet Christmas tree decorations on your tree, you’ll need to attach hanging loops. Cut a piece of yarn or ribbon, fold it in half, and sew the folded end to the top of your decoration. Make sure it’s securely attached so that your decorations don’t fall off the tree.
Step 7: Admire Your Handiwork
Now that you’ve completed your crochet Christmas tree decorations, take a moment to admire your handiwork. Hang them on your Christmas tree and see how they add a personal touch and a cozy feel to your holiday decor.
Estimated Time and Tips
The time it takes to complete your crochet Christmas tree decorations will depend on the complexity of the pattern and your crochet skill level. On average, each decoration can take anywhere from 1 to 3 hours to complete. Plan your time accordingly and enjoy the process.
Here are a few tips to help you along the way:
- Choose yarn that is appropriate for the size of your decorations. Thicker yarn will result in larger decorations, while thinner yarn will create smaller ones.
- Practice your tension to ensure consistent stitch sizes throughout your project.
- Don’t be afraid to experiment with different colors and yarn types. This is your chance to let your creativity shine.
- If you make a mistake, don’t panic! Crochet is a forgiving craft, and most mistakes can be easily fixed.
- Take breaks and rest your hands to avoid strain or discomfort.
Inspiration for Your Crochet Christmas Tree Decorations
Still not sure what kind of crochet Christmas tree decorations to make? Here are a few ideas to inspire you:
- Crochet mini stockings in traditional Christmas colors and hang them on your tree.
- Create a set of crochet snowflakes in different sizes and shades of blue.
- Make a collection of crochet stars in gold and silver yarn for a glamorous touch.
- Crochet tiny angels with delicate wings and place them on the top branches of your tree.
- Combine different crochet shapes, such as hearts, bells, and candy canes, for a whimsical and colorful tree.
Remember, the possibilities are endless, and the most important thing is to have fun and enjoy the process of creating your own unique crochet Christmas tree decorations.
Summary
Crocheting your own Christmas tree decorations is a wonderful way to add a personal touch to your holiday decor. With just a few materials and some basic crochet skills, you can create unique and charming ornaments that will make your tree stand out. Follow the step-by-step instructions in this article, gather your materials, and let your creativity shine. Whether you choose to make mini stockings, snowflakes, stars, or angels, your crochet Christmas tree decorations will bring joy and warmth to your home this holiday season. Happy crocheting!


