Transforming an Old Dresser into a Stylish Kitchen Island: A Step-by-Step Guide
Upcycling an Old Dresser into a Kitchen Island
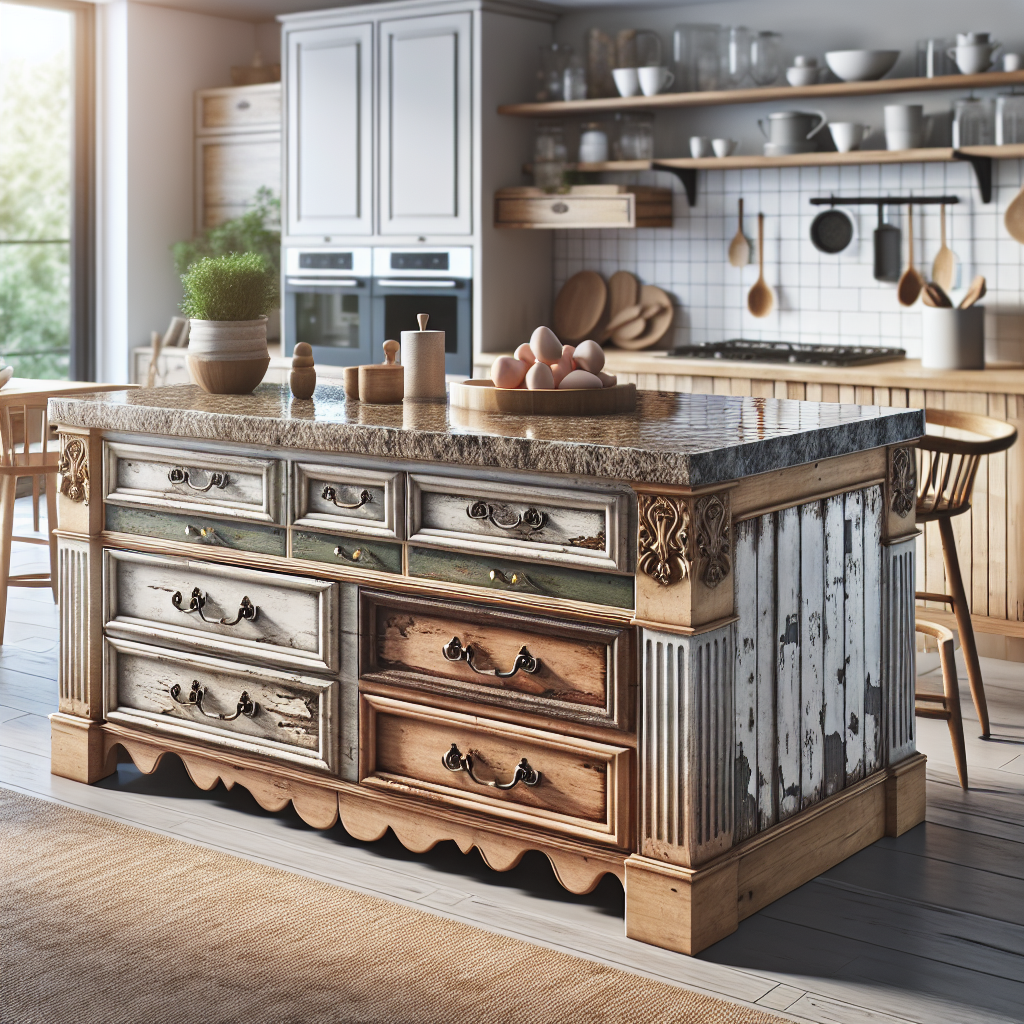
Are you tired of your old dresser taking up space in your bedroom? Why not give it a new lease on life by transforming it into a stylish kitchen island? Upcycling furniture is not only a great way to save money, but it also allows you to add a unique touch to your home. In this step-by-step guide, we will show you how to turn your old dresser into a functional and eye-catching kitchen island.
The first step in this transformation process is to choose the right dresser. Look for a sturdy piece with enough surface area to accommodate your needs. Consider the height and width of the dresser, as well as the number of drawers it has. Keep in mind that you will be removing some of the drawers to create space for shelves or cabinets.
Once you have found the perfect dresser, it’s time to gather your tools and materials. You will need a screwdriver, a saw, sandpaper, paint or stain, a paintbrush, and some hardware for the finishing touches. Make sure to measure the dimensions of your dresser and take note of any additional materials you may need, such as plywood or trim.
Now that you have everything you need, it’s time to start the transformation process. Begin by removing the drawers and any hardware attached to the dresser. Set aside the drawers for another project or donate them to a local charity. Next, use the saw to cut out the top of the dresser, creating a space for a countertop. Sand down any rough edges to ensure a smooth surface.
With the basic structure of your kitchen island in place, it’s time to add some personality. Choose a paint or stain color that complements your kitchen decor and apply it to the dresser using a paintbrush. Allow the paint or stain to dry completely before moving on to the next step. If desired, you can also add decorative trim or molding to enhance the overall look of your kitchen island.
Once the paint or stain has dried, it’s time to add the finishing touches. Attach new hardware to the drawers or cabinets, giving your kitchen island a polished and cohesive look. Consider adding hooks or racks to hang utensils or towels, maximizing the functionality of your new space. Finally, add a countertop of your choice, such as butcher block or granite, to complete the transformation.
Now that you have successfully upcycled your old dresser into a stylish kitchen island, it’s time to enjoy the fruits of your labor. Not only have you saved money by repurposing an existing piece of furniture, but you have also added a unique and personalized touch to your kitchen. Show off your new kitchen island to friends and family, and inspire them to embark on their own upcycling projects.
In conclusion, transforming an old dresser into a kitchen island is a rewarding and creative project. By following this step-by-step guide, you can turn a neglected piece of furniture into a functional and stylish addition to your home. So, grab your tools and get ready to upcycle your way to a more beautiful and sustainable living space.


