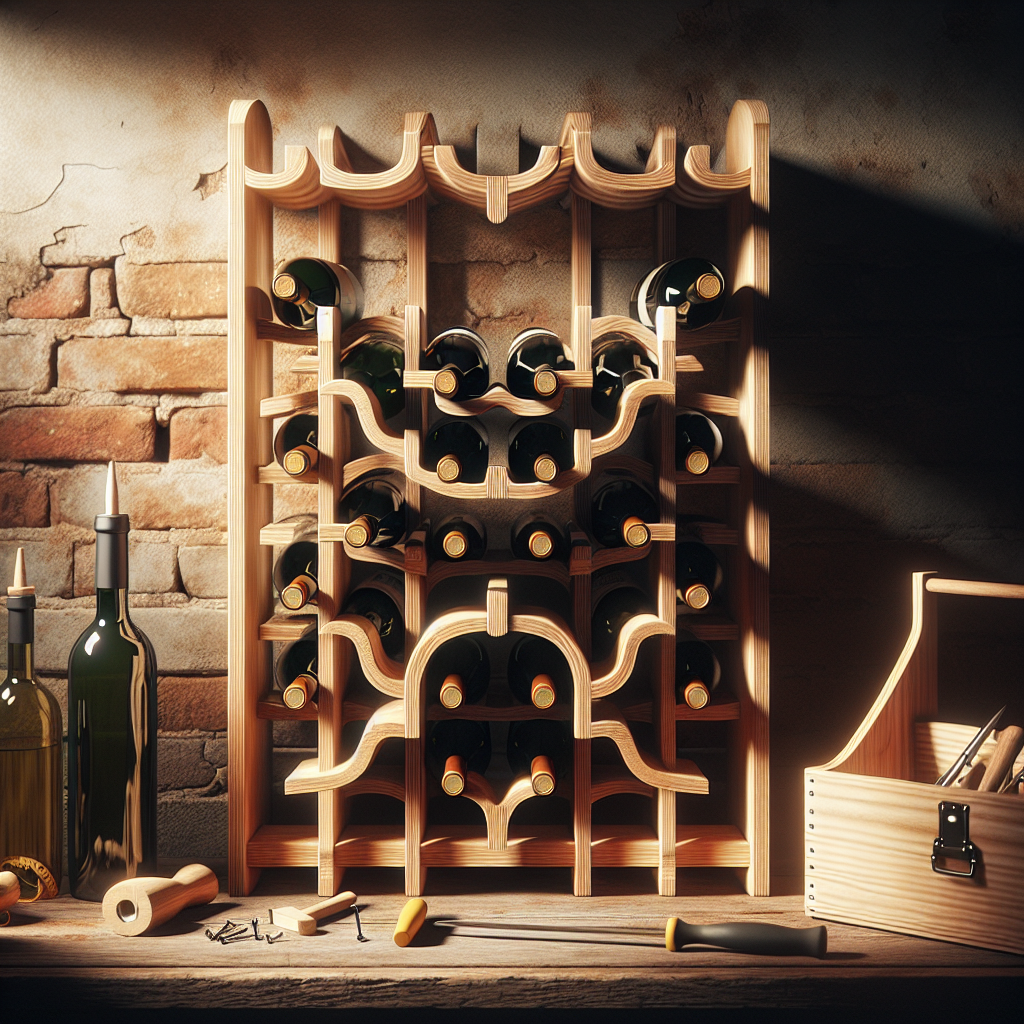
Custom Wine Rack: A DIY Project for Wine Enthusiasts
Are you a wine enthusiast looking for a creative way to display your collection? Look no further! In this article, we will guide you through the process of creating your very own custom wine rack. Not only will this project add a touch of elegance to your home, but it will also showcase your wine collection in a unique and personalized way. So, let’s get started on this exciting DIY journey!
Materials Needed
- Wooden planks
- Screws
- Drill
- Saw
- Sandpaper
- Measuring tape
- Pencil
- Level
- Stain or paint (optional)
- Paintbrush (if using stain or paint)
Step 1: Planning and Design
Before diving into the construction process, it’s important to plan and design your custom wine rack. Consider the available space in your home and the number of wine bottles you wish to display. Sketch out your desired design, taking into account the dimensions of the wooden planks you have.
Think about the style you want to achieve. Do you prefer a rustic look or a more modern design? This will help you determine the type of wood and finish you should use.
Step 2: Gathering the Materials
Once you have a clear plan in mind, gather all the necessary materials listed above. Make sure to choose high-quality wooden planks that are sturdy enough to hold the weight of the wine bottles.
Step 3: Cutting the Wooden Planks
Using a saw, carefully cut the wooden planks according to your design. Measure and mark the dimensions beforehand to ensure accuracy. Remember to wear protective goggles and gloves while operating the saw.
Step 4: Sanding the Edges
After cutting the wooden planks, use sandpaper to smooth out any rough edges. This will prevent splinters and give your wine rack a polished look.
Step 5: Assembling the Wine Rack
Now it’s time to assemble your custom wine rack. Lay out the wooden planks according to your design and use a drill to attach them together. Start by creating the base and then build upwards, securing each plank with screws.
Ensure that the wine rack is level and stable by using a level during the assembly process. This will prevent any wobbling or instability once the wine bottles are placed on the rack.
Step 6: Finishing Touches
If desired, you can add a stain or paint to your wine rack to enhance its appearance. Choose a color that complements your home decor and apply it evenly using a paintbrush. Allow the stain or paint to dry completely before proceeding.
Step 7: Displaying Your Wine Collection
Now that your custom wine rack is complete, it’s time to showcase your wine collection! Carefully place each bottle on the rack, ensuring that they are secure and stable. Arrange them in a visually appealing manner, considering factors such as bottle size and label visibility.
Remember to store your wine in a cool and dark environment to maintain its quality. A custom wine rack not only provides an elegant display but also helps to keep your bottles organized and easily accessible.
Step 8: Maintenance and Care
To ensure the longevity of your custom wine rack, it’s important to perform regular maintenance. Dust the rack regularly and wipe away any spills or stains immediately. If you notice any loose screws or instability, tighten or reinforce them as needed.
Additionally, periodically check the condition of the wood and apply a fresh coat of stain or paint if necessary. This will help protect the wood from moisture and maintain its aesthetic appeal.
Step 9: Enjoy Your Custom Wine Rack
Congratulations! You have successfully completed your custom wine rack project. Sit back, relax, and enjoy the beauty of your wine collection showcased in a personalized and stylish manner.
Summary
Creating a custom wine rack is a rewarding DIY project that allows wine enthusiasts to display their collection in a unique and personalized way. By following the step-by-step instructions outlined in this article, you can design and build your own wine rack with ease.
Remember to plan and design your wine rack, gather the necessary materials, and carefully cut and assemble the wooden planks. Don’t forget the finishing touches such as sanding, staining, or painting to enhance the overall appearance.
Once your custom wine rack is complete, proudly display your wine collection and enjoy the elegance it brings to your home. With regular maintenance and care, your wine rack will continue to be a functional and visually appealing addition to your space for years to come.