Festive Christmas Pillow Cases: Sewing Instructions for Beautiful Holiday Decor
Are you looking to add a touch of festive cheer to your living space this Christmas? Look no further! In this comprehensive guide, we will teach you how to create stunning Christmas-themed pillow cases that will instantly transform your home into a winter wonderland. With just a few simple materials and a little bit of sewing know-how, you’ll be able to create beautiful and unique pillow cases that will impress your guests and bring joy to your family. So, let’s get started on this fun and creative DIY project!
Materials You’ll Need
Before we dive into the step-by-step instructions, let’s gather all the materials you’ll need for this project:
- Fabric – Choose a festive Christmas-themed fabric that matches your personal style. You’ll need enough fabric to cover your pillows and create a back panel.
- Thread – Select a thread color that complements your fabric.
- Pillow Inserts – Make sure you have the right size pillow inserts for your pillow cases.
- Scissors – A good pair of fabric scissors is essential for cutting your fabric.
- Pins – Use pins to hold your fabric in place while sewing.
- Sewing Machine – If you have a sewing machine, it will make the process faster and easier. However, you can also sew by hand if you prefer.
- Iron – An iron will help you achieve crisp and professional-looking seams.
- Decorative Embellishments (optional) – If you want to add extra flair to your pillow cases, consider using ribbons, buttons, or other decorative elements.
Step-by-Step Instructions
Now that you have all your materials ready, let’s start sewing your festive Christmas pillow cases:
Step 1: Measure and Cut Your Fabric
Begin by measuring your pillow inserts. Add an extra inch to both the width and length measurements to allow for seam allowances. Using these measurements, cut two pieces of fabric for each pillow case – one for the front panel and one for the back panel.
Step 2: Pin and Sew the Front Panel
Take the fabric for the front panel and fold it in half with the right sides facing each other. Pin the edges together, leaving a small opening at the bottom for turning the fabric right side out. Sew along the pinned edges, making sure to backstitch at the beginning and end to secure the stitches. Trim the excess fabric and clip the corners to reduce bulk.
Step 3: Turn the Fabric Right Side Out and Iron
Gently turn the fabric right side out through the opening. Use a pencil or a chopstick to push out the corners for a crisp finish. Once the fabric is turned right side out, iron it to remove any wrinkles and create a smooth surface.
Step 4: Pin and Sew the Back Panel
Repeat the same process for the back panel of the pillow case. Fold the fabric in half with the right sides facing each other and pin the edges together. Sew along the pinned edges, leaving a small opening at the bottom for turning the fabric right side out. Trim the excess fabric and clip the corners.
Step 5: Attach the Front and Back Panels
Place the front panel and back panel of the pillow case together with the right sides facing each other. Pin the edges together, making sure to align the corners and edges. Sew along the pinned edges, leaving a small opening at the bottom for inserting the pillow insert.
Step 6: Turn the Pillow Case Right Side Out and Insert the Pillow
Gently turn the pillow case right side out through the opening. Use a pencil or a chopstick to push out the corners for a crisp finish. Insert the pillow insert through the opening, making sure it fits snugly. Hand stitch the opening closed using a ladder stitch or a slip stitch.
Step 7: Add Decorative Embellishments (optional)
If you want to add some extra festive flair to your pillow cases, now is the time to get creative! Consider adding ribbons, buttons, or other decorative elements to make your pillow cases truly unique. Sew or glue these embellishments onto the front panel of the pillow case, taking care not to obstruct the opening for the pillow insert.
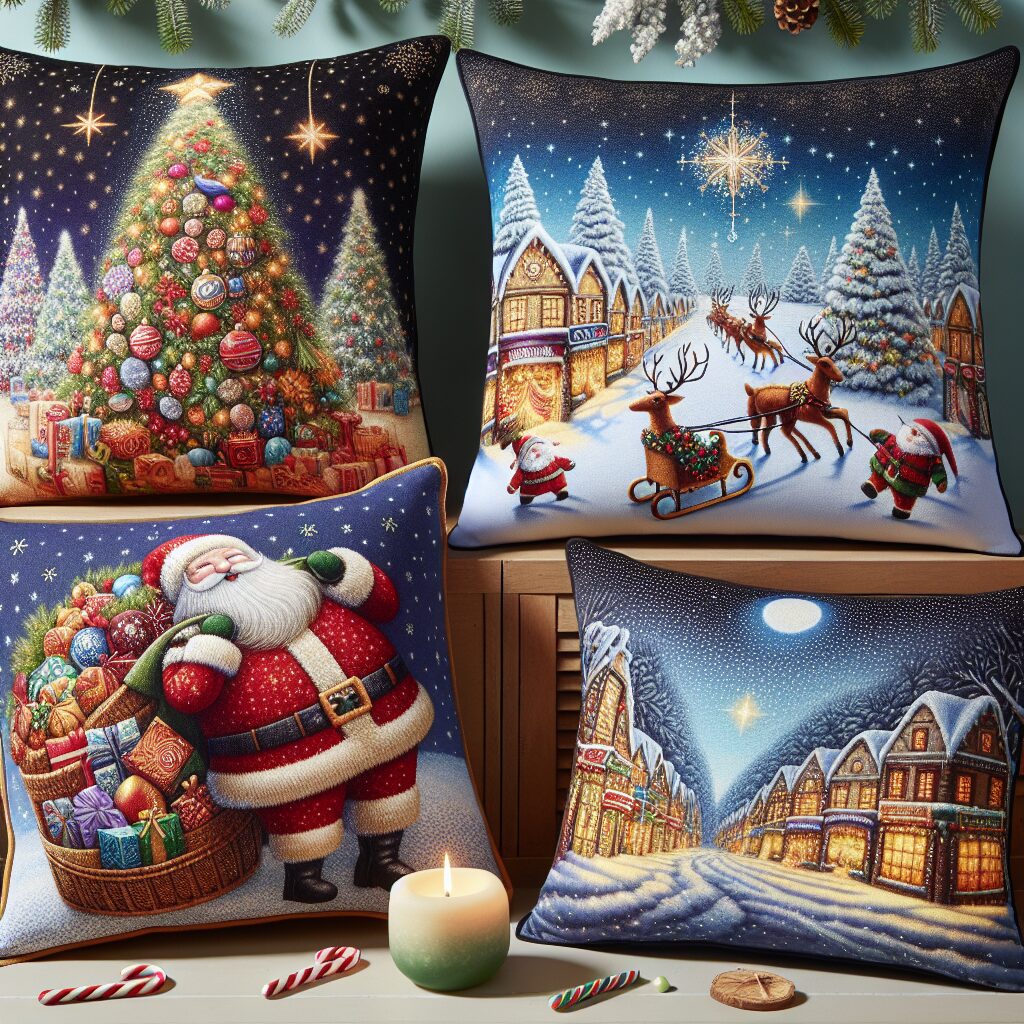
Project Completion and Inspiration
Congratulations! You have successfully sewn your own festive Christmas pillow cases. Now, it’s time to step back and admire your beautiful creations. Imagine how these pillow cases will instantly brighten up your living space and spread holiday cheer to all who enter your home.
Here’s an image to inspire you and give you an idea of how your completed project might look:

As you can see, these pillow cases add a touch of elegance and whimsy to any room. Feel free to experiment with different fabrics, colors, and embellishments to create pillow cases that reflect your personal style and holiday spirit.
Summary
In this instructional article, we have guided you through the process of sewing festive Christmas pillow cases. By following our step-by-step instructions, you can create beautiful and unique pillow cases that will add a festive touch to your living space. Remember to gather all the necessary materials, measure and cut your fabric, sew the front and back panels, attach them together, and add any decorative embellishments you desire. Once completed, your pillow cases will bring joy and holiday spirit to your home. Happy sewing and happy holidays!


