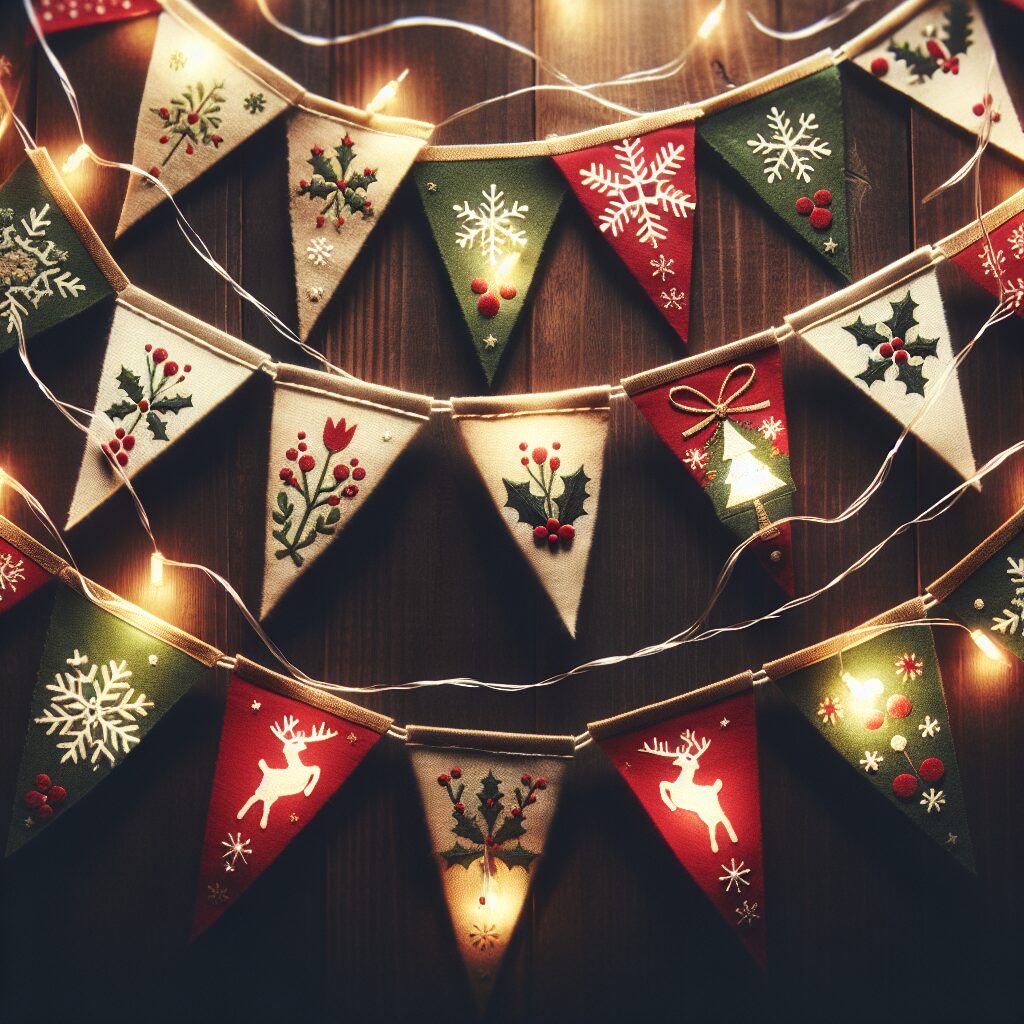
Handmade Christmas Bunting: Decorate Your Space with Festive Bunting
Christmas is a time of joy, celebration, and decoration. One of the best ways to add a festive touch to your space is by creating handmade Christmas bunting. Bunting is a versatile and charming decoration that can be hung on walls, mantels, or even across doorways. In this article, we will guide you through the process of making your own Christmas bunting, step by step. Get ready to unleash your creativity and bring the holiday spirit into your home!
Materials You Will Need
- Fabric in various Christmas-themed patterns and colors
- Scissors
- Cardstock or cardboard
- Pencil
- Ruler
- Iron
- Sewing machine or needle and thread
- Twine or ribbon
- Hot glue gun (optional)
- Decorative elements such as buttons, beads, or sequins (optional)
Step-by-Step Instructions
Step 1: Choose Your Fabric
Start by selecting the fabric for your bunting. Look for Christmas-themed patterns and colors that match your personal style and the overall aesthetic of your space. Consider using fabrics with motifs like snowflakes, reindeer, or Christmas trees. You can mix and match different fabrics to create a unique and eye-catching bunting.
Step 2: Measure and Cut the Triangles
Using the cardstock or cardboard, create a triangle template. Decide on the size of your triangles and cut the template accordingly. A typical size for bunting triangles is around 6 inches wide and 8 inches long, but feel free to adjust the dimensions to your liking.
Place the template on the fabric and trace around it with a pencil. Repeat this step until you have enough triangles to create your desired length of bunting. Remember to cut an even number of triangles, as they will be sewn together later.
Step 3: Iron the Triangles
Once you have cut out all the triangles, iron them to remove any wrinkles and ensure they lay flat. This step will make it easier to sew the triangles together and create a neat and professional-looking bunting.
Step 4: Sew the Triangles
Take two triangles and place them together, with the right sides facing each other. Pin them in place to prevent them from shifting while sewing. Using a sewing machine or needle and thread, sew along the two longest sides of the triangles, leaving the top side open. Repeat this process for all the triangles.
If you want to add a decorative touch, you can sew buttons, beads, or sequins onto the triangles before sewing them together. This will add an extra sparkle to your bunting.
Step 5: Turn the Triangles Inside Out
Once all the triangles are sewn, carefully turn them inside out through the open top side. Use a pencil or a chopstick to push out the corners and create sharp edges. Iron the triangles again to make them look crisp and polished.
Step 6: Attach the Triangles to the Twine or Ribbon
Measure the length of twine or ribbon you will need for your bunting. Leave some extra length on both ends for hanging. Lay the twine or ribbon flat and evenly space out the triangles along its length. You can use a ruler to ensure they are evenly distributed.
There are two methods you can use to attach the triangles to the twine or ribbon:
Method 1: Sewing
Using a sewing machine or needle and thread, sew along the top edge of each triangle, attaching it to the twine or ribbon. Make sure to secure the triangles firmly in place. This method provides a clean and durable finish.
Method 2: Gluing
If you prefer a quicker and easier option, you can use a hot glue gun to attach the triangles to the twine or ribbon. Apply a small amount of hot glue to the top edge of each triangle and press it firmly onto the twine or ribbon. Be careful not to burn yourself with the hot glue.
Step 7: Hang Your Handmade Christmas Bunting
Once all the triangles are attached to the twine or ribbon, your handmade Christmas bunting is ready to be displayed. Find a suitable spot in your space, such as a wall, mantel, or doorway, and hang the bunting using nails, hooks, or tape.
Stand back and admire your festive creation! The handmade Christmas bunting will add a touch of warmth and holiday cheer to your home.
Estimated Time and Final Thoughts
The time required to complete this project will depend on your sewing skills and the number of triangles you want to make. On average, it should take around 2-3 hours to create a medium-sized bunting.
Remember to have fun and let your creativity shine through. Experiment with different fabrics, colors, and decorative elements to make your bunting truly unique. You can also involve your family and friends in the process, making it a fun and memorable activity for everyone.
Now that you know how to make handmade Christmas bunting, it’s time to gather your materials and get started. Embrace the holiday spirit and transform your space into a festive wonderland with this charming and personalized decoration. Happy crafting!


