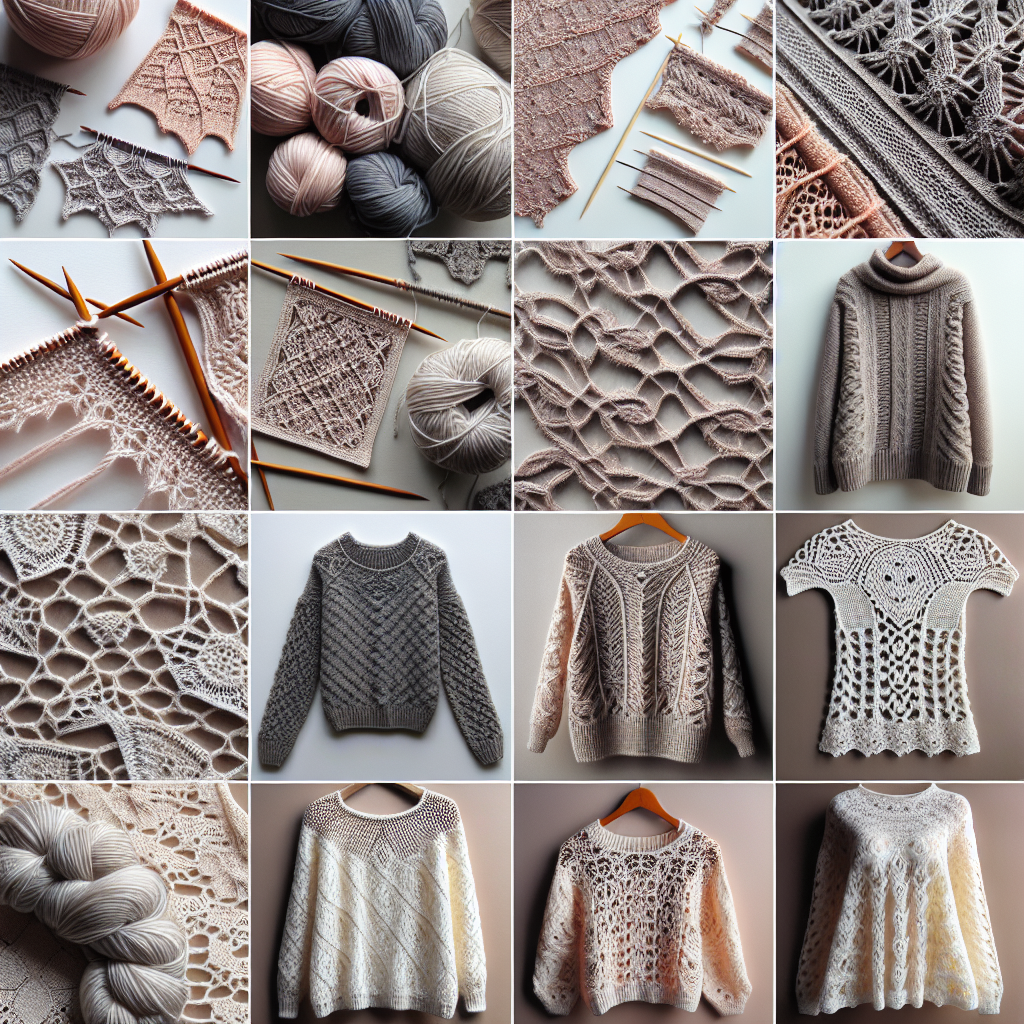
Lace Knitting Patterns: From Scarves to Intricate Diamond Sweaters
Knitting is a timeless craft that allows you to create beautiful and intricate garments. One particular style that adds a delicate touch to any project is lace knitting. Lace patterns can range from simple and elegant to complex and breathtaking, making them suitable for all skill levels. In this article, we will explore the world of lace knitting patterns and guide you through the process of creating your own lace masterpiece.
Materials Needed
Before we dive into the world of lace knitting, let’s gather all the materials you’ll need for this project:
- Knitting needles (size will depend on your chosen yarn)
- Lace weight yarn or any yarn of your choice
- Tapestry needle
- Scissors
- Stitch markers
- Blocking tools (optional, but highly recommended)
Choosing the Right Yarn and Needles
When it comes to lace knitting, the choice of yarn and needles is crucial. Lace weight yarn is the most common choice for lace patterns as it creates a delicate and airy fabric. However, you can experiment with different yarn weights to achieve different effects. Just keep in mind that the thicker the yarn, the less intricate the lace pattern will appear.
As for the needles, choose a size that complements your yarn. Lace patterns often require smaller needles to create tighter stitches and enhance the lace motifs. However, make sure the needles are comfortable for you to work with, as lace knitting can be time-consuming.
Getting Started: Casting On
Step 1: Start by making a slipknot and placing it on one of your knitting needles.
Step 2: Hold the needle with the slipknot in your right hand and the empty needle in your left hand.
Step 3: Insert the empty needle into the slipknot from left to right, making sure the working yarn is behind the needles.
Step 4: Wrap the working yarn around the empty needle counterclockwise.
Step 5: Pull the wrapped yarn through the slipknot, creating a new stitch on the empty needle.
Step 6: Slip the new stitch onto the right-hand needle, and you have successfully cast on one stitch.
Repeat steps 3 to 6 until you have cast on the desired number of stitches for your project.
Understanding Lace Knitting Charts
Lace knitting patterns are often presented in the form of charts. These charts use symbols to represent different stitches and indicate where to increase or decrease stitches to create the lace motifs. Understanding these symbols is essential for successfully following a lace knitting pattern.
Here are some common lace knitting symbols you may encounter:
- O: Represents a yarn over (YO), which creates an eyelet in the fabric.
- K: Stands for a knit stitch.
- P: Stands for a purl stitch.
- \: Represents a decrease stitch, such as knit two stitches together (K2tog).
- /: Represents a decrease stitch, such as slip one stitch knitwise, knit one stitch, pass the slipped stitch over (SKP).
Make sure to refer to the legend provided with your lace knitting pattern to understand the specific symbols used.
Following a Lace Knitting Pattern
Step 1: Start by studying the lace knitting pattern and familiarizing yourself with the chart symbols.
Step 2: Begin knitting according to the pattern instructions, following the chart row by row.
Step 3: Use stitch markers to mark any important sections or repeats in the pattern.
Step 4: Pay close attention to any stitch counts or special instructions provided in the pattern.
Step 5: Continue knitting row by row, referring to the chart and pattern instructions as needed.
Step 6: Take your time and enjoy the process of creating intricate lace motifs.
Blocking Your Lace Project
Blocking is a crucial step in lace knitting as it helps open up the lace motifs and gives your project its final shape. Here’s how to block your lace project:
Step 1: Fill a basin or sink with lukewarm water and add a small amount of wool wash or mild detergent.
Step 2: Gently submerge your finished lace project in the water, making sure it is fully saturated.
Step 3: Let the project soak for about 15 minutes, allowing the fibers to relax.
Step 4: Carefully remove the project from the water and gently squeeze out the excess moisture. Do not wring or twist the fabric.
Step 5: Lay a clean towel on a flat surface and place your lace project on top.
Step 6: Gently shape the project to its desired dimensions, using blocking wires or pins to define the lace motifs.
Step 7: Leave the project to dry completely. This may take a day or two, depending on the yarn and climate.
Step 8: Once dry, carefully remove the blocking wires or pins, and your lace project is ready to be admired.
Inspiration for Your Lace Knitting Projects
Now that you have the knowledge and skills to create beautiful lace knitting patterns, let’s explore some inspiring project ideas:
- Lace Scarf: A simple lace scarf is a great starting point for beginners. Choose a soft and luxurious yarn to create a delicate accessory.
- Lace Shawl: Take your lace knitting skills to the next level by knitting a stunning lace shawl. Experiment with different lace motifs and yarn colors to create a unique piece.
- Lace Socks: Add a touch of elegance to your feet with lace-knit socks. These intricate socks make for a challenging yet rewarding project.
- Lace Sweater: For experienced knitters, a lace sweater is the ultimate challenge. Choose a pattern with intricate lace motifs and enjoy the process of creating a wearable work of art.
Remember, lace knitting requires patience and attention to detail. Take your time, practice your stitches, and soon you’ll be creating stunning lace garments that will be cherished for years to come.
Conclusion
Lace knitting patterns offer a delicate touch to garments and cater to all skill levels. By following the step-by-step instructions provided in this article, you can embark on your lace knitting journey with confidence. Remember to choose the right yarn and


