The Beginner’s Guide to Building a Pergola
Are you looking to add a touch of elegance and functionality to your outdoor space? Building a pergola is the perfect DIY project for you! A pergola not only provides shade and privacy but also adds beauty and value to your home. In this comprehensive guide, we will walk you through the step-by-step process of building your very own pergola. So, grab your tools and let’s get started!
Materials and Tools You Will Need
Before we dive into the construction process, let’s gather all the necessary materials and tools:
- Pressure-treated lumber (4×4 posts, 2×6 beams, and 2×2 slats)
- Concrete mix
- Post hole digger
- Level
- Drill
- Screws
- Hammer
- Saw
- Tape measure
- Pencil
- Safety goggles
- Gloves
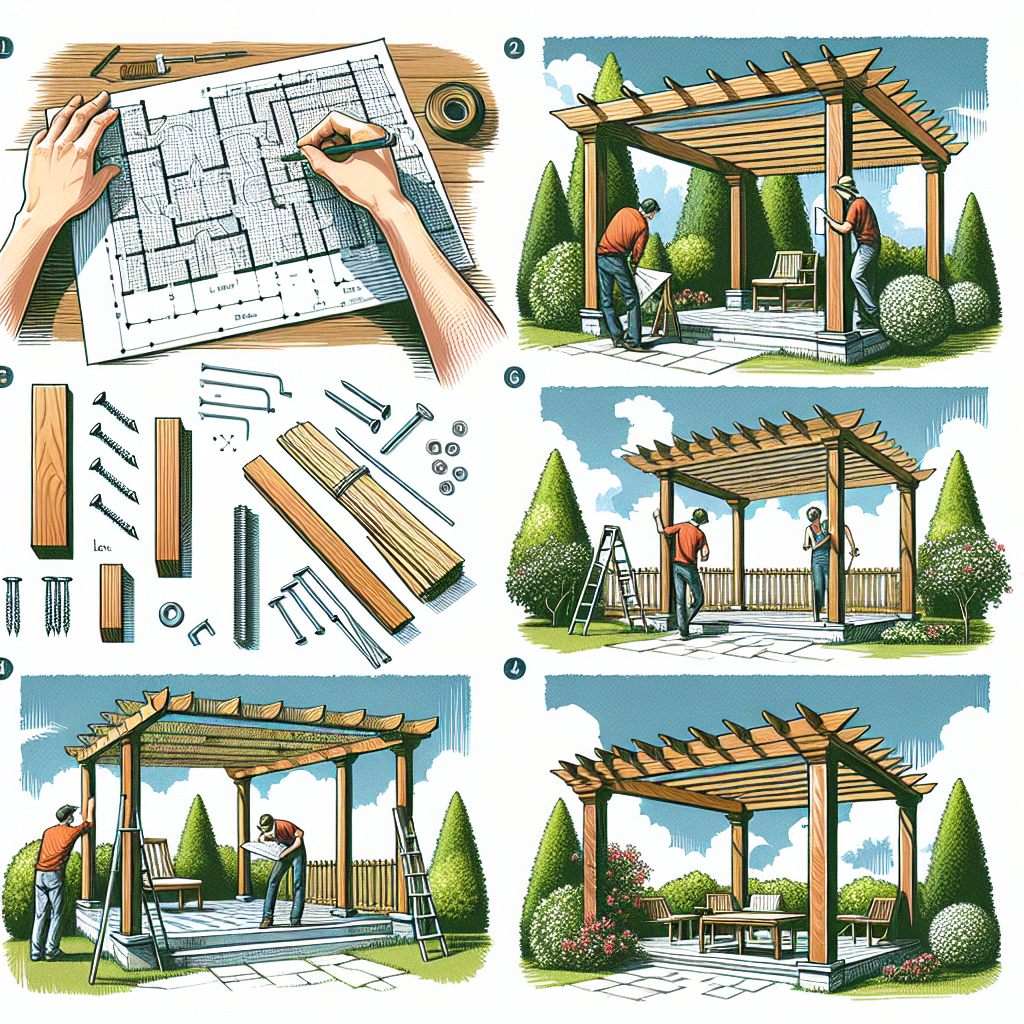
Step 1: Planning and Design
Before you start building, it’s important to have a clear plan and design in mind. Consider the size and shape of your pergola, as well as its placement in your outdoor space. Measure the area where you want to install the pergola and mark the locations for the posts.
Pro tip: Check with your local building codes and obtain any necessary permits before starting the construction process.
Step 2: Digging the Post Holes
Using a post hole digger, dig holes at the marked locations for the posts. The depth of the holes should be at least one-third of the length of the posts. Make sure the holes are evenly spaced and level.
Step 3: Setting the Posts
Place the 4×4 posts into the holes and fill them with concrete mix. Use a level to ensure that the posts are plumb and straight. Allow the concrete to dry completely before moving on to the next step.
Step 4: Installing the Beams
Once the concrete has dried, it’s time to install the beams. Attach the 2×6 beams to the posts using screws. Make sure the beams are level and evenly spaced.
Step 5: Adding the Slats
Now it’s time to add the slats to create the roof of the pergola. Attach the 2×2 slats to the beams using screws. Space the slats evenly and make sure they are securely fastened.
Step 6: Finishing Touches
With the main structure of the pergola complete, it’s time to add some finishing touches. Sand any rough edges and apply a coat of weather-resistant stain or paint to protect the wood from the elements. You can also add decorative elements such as climbing plants or string lights to enhance the beauty of your pergola.
Step 7: Enjoy Your New Pergola
Congratulations! You have successfully built your very own pergola. Now it’s time to sit back, relax, and enjoy your outdoor oasis. Whether you use it for entertaining guests, dining al fresco, or simply as a peaceful retreat, your pergola will surely become the highlight of your outdoor space.
Conclusion
Building a pergola may seem like a daunting task, but with the right tools and guidance, it can be a rewarding DIY project. By following the step-by-step instructions outlined in this guide, you will be able to create a beautiful and functional pergola that will enhance your outdoor living experience. So, gather your materials, put on your DIY hat, and let your creativity shine as you embark on this exciting journey of building your own pergola!


