DIY Under-Cabinet Lighting for Ambiance and Utility
Are you tired of your kitchen feeling dim and lacking in ambiance? Do you struggle to see what you’re doing when you’re preparing meals? If so, it’s time to consider adding under-cabinet lighting to your kitchen. Not only will this enhance the overall look and feel of your space, but it will also provide much-needed task lighting for your countertop work areas. In this comprehensive guide, we will walk you through the step-by-step process of installing DIY under-cabinet lighting, so you can achieve both ambiance and utility in your kitchen.
Materials You Will Need
- LED light strips
- Power supply
- Wire connectors
- Wire cutters/strippers
- Mounting clips
- Screws
- Drill
- Tape measure
- Pencil
- Level
Step 1: Measure and Plan
The first step in any DIY project is careful planning. Start by measuring the length of the area where you want to install the under-cabinet lighting. This will help you determine how much LED light strip you will need. Additionally, consider the placement of your power supply and how you will run the wires to connect the lights.
Step 2: Choose the Right LED Light Strips
When selecting LED light strips, it’s important to choose ones that are specifically designed for under-cabinet lighting. Look for strips that are flexible, easy to install, and have a high color rendering index (CRI) for accurate color representation. Additionally, consider the color temperature of the lights to achieve the desired ambiance in your kitchen.
Step 3: Install the Power Supply
Before installing the LED light strips, you’ll need to install the power supply. Choose a location that is easily accessible and close to an electrical outlet. Use screws to secure the power supply in place, ensuring it is level and stable.
Step 4: Mount the LED Light Strips
Using the mounting clips provided with the LED light strips, attach them to the underside of the cabinets. Make sure to space them evenly and align them with your measurements from step 1. Use a level to ensure they are straight. Once the clips are in place, simply snap the LED light strips into the clips.
Step 5: Connect the Wires
Using wire connectors, connect the wires from the LED light strips to the power supply. Follow the manufacturer’s instructions for proper wiring techniques. Make sure all connections are secure and insulated to prevent any electrical hazards.
Step 6: Test and Adjust
Once all the wiring is complete, plug in the power supply and test the lights. Make any necessary adjustments to the positioning of the LED light strips or the angle of the light to achieve the desired effect. Take your time to ensure everything is perfect before moving on to the final step.
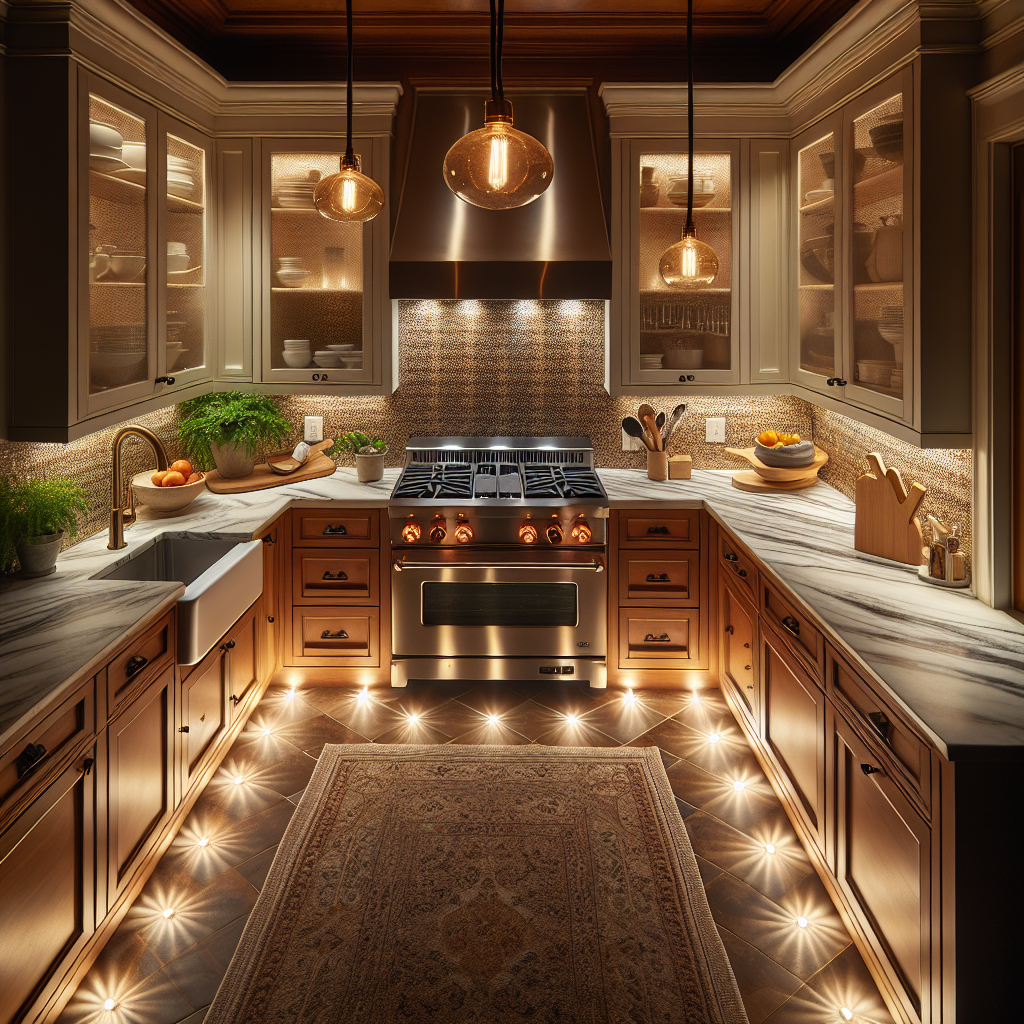
Step 7: Enjoy Your New Under-Cabinet Lighting
Now that your DIY under-cabinet lighting is installed and functioning properly, it’s time to sit back and enjoy the transformation. Not only will you have improved task lighting for your kitchen activities, but you’ll also have a beautiful and inviting ambiance that enhances the overall atmosphere of your space.
Estimated Time and Cost
The time and cost of this project will vary depending on the size of your kitchen and the specific materials you choose. On average, it should take approximately 2-4 hours to complete the installation. The cost will depend on the quality and quantity of the LED light strips you purchase, but you can expect to spend around $50-$100.
Conclusion
Adding DIY under-cabinet lighting to your kitchen is a fantastic way to improve both the functionality and aesthetics of the space. By following the step-by-step instructions outlined in this guide, you can easily achieve the desired ambiance and utility in your kitchen. Remember to take your time during the planning and installation process to ensure everything is done correctly. Once complete, you’ll be amazed at the difference under-cabinet lighting can make in your kitchen.