Upgrading Kitchen Countertops with DIY Techniques
Are you tired of your old, worn-out kitchen countertops? Do you dream of having a beautiful, modern kitchen but don’t want to spend a fortune on professional renovations? Look no further! In this comprehensive guide, we will teach you how to upgrade your kitchen countertops using DIY techniques. With a little bit of time, effort, and creativity, you can transform your kitchen into a stylish and functional space that you’ll love spending time in.
Step 1: Planning and Preparation
Before you begin your kitchen countertop upgrade project, it’s important to plan and prepare properly. Here are the key steps to get started:
- Measure your existing countertops: Start by measuring the length, width, and depth of your current countertops. This will help you determine the amount of materials you’ll need for the upgrade.
- Choose your countertop material: There are various options available, such as granite, quartz, laminate, and concrete. Consider your budget, style preferences, and durability when making your decision.
- Gather the necessary tools and materials: Depending on the type of countertop material you choose, you’ll need specific tools and materials. Make a list and ensure you have everything before you begin.
- Set a timeline: Determine how long the project will take and plan accordingly. Keep in mind that some countertop materials may require additional curing or drying time.
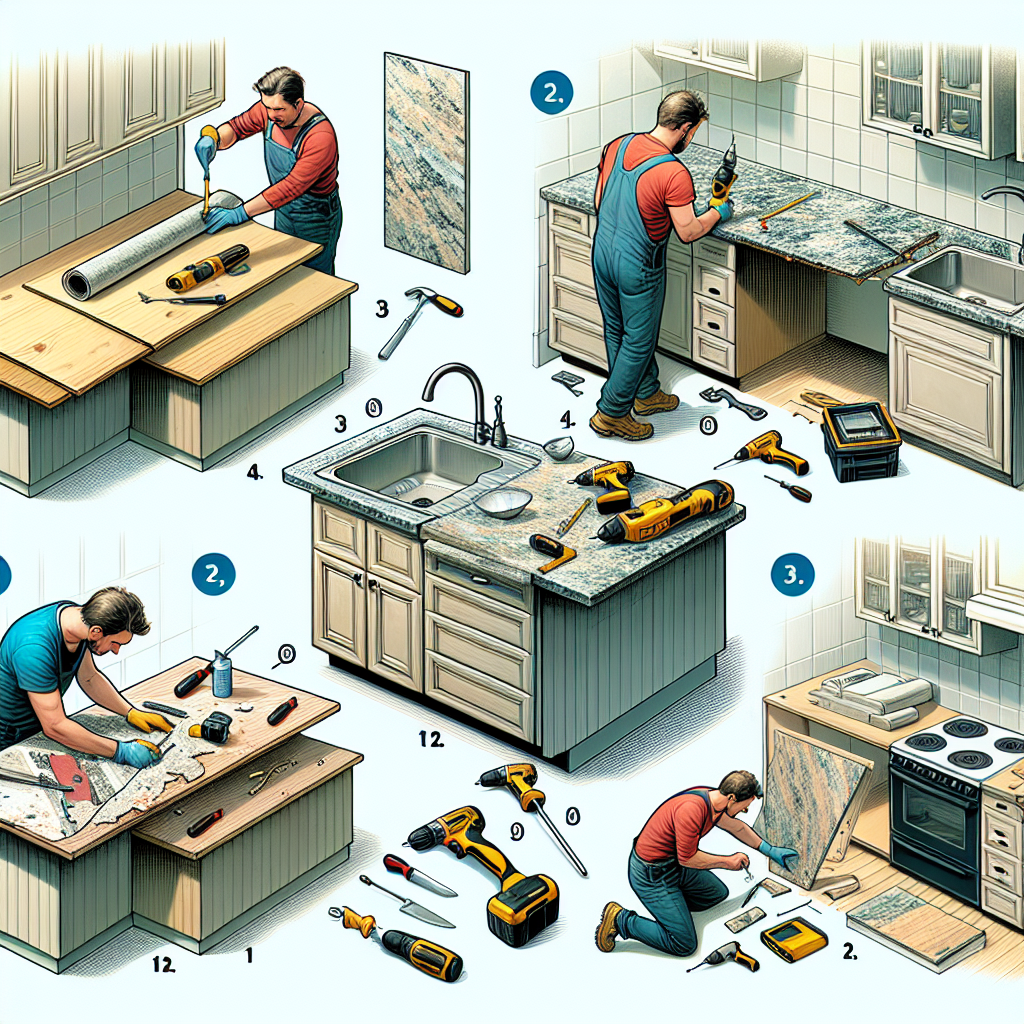
Step 2: Removing the Old Countertops
Now that you’re ready to get started, it’s time to remove the old countertops. Follow these steps:
- Turn off the water supply: Before you begin, shut off the water supply to your kitchen sink to avoid any leaks or accidents.
- Disconnect the plumbing: Carefully disconnect the plumbing connections under the sink. Place a bucket underneath to catch any water that may spill.
- Remove the sink: Unscrew the clips holding the sink in place and carefully lift it out. Set it aside for now.
- Detach the countertops: Use a pry bar or a screwdriver to remove any screws or nails holding the countertops in place. Gently lift them off the cabinets and set them aside.
- Clean the cabinets: Take this opportunity to clean and prepare the cabinets for the new countertops. Remove any debris or adhesive left behind.
Step 3: Installing the New Countertops
With the old countertops out of the way, it’s time to install the new ones. Follow these steps:
- Measure and cut the new countertops: Using your measurements from Step 1, carefully cut the new countertops to fit your kitchen space. Double-check your measurements before making any cuts.
- Apply adhesive: Depending on the type of countertop material you’re using, apply the appropriate adhesive to the cabinets. Follow the manufacturer’s instructions for best results.
- Place the countertops: Carefully place the new countertops on top of the adhesive, ensuring they are level and aligned properly. Press down firmly to secure them in place.
- Attach the sink: If you’re reusing your old sink, carefully place it back into the countertop cutout. Secure it with the provided clips or brackets.
- Reconnect the plumbing: Reconnect the plumbing connections under the sink, ensuring everything is tight and secure. Turn on the water supply and check for any leaks.
Step 4: Finishing Touches
Now that your new countertops are installed, it’s time to add the finishing touches. Follow these steps:
- Seal the countertops: Depending on the material you chose, you may need to seal the countertops to protect them from stains and damage. Follow the manufacturer’s instructions for the appropriate sealant.
- Install backsplash: Consider adding a backsplash to complement your new countertops. Choose a material that matches your kitchen’s style and install it according to the manufacturer’s instructions.
- Accessorize your kitchen: Add the final touches to your upgraded kitchen by accessorizing with new hardware, lighting fixtures, and decor. Let your personal style shine through!
Conclusion
Congratulations! You have successfully upgraded your kitchen countertops using DIY techniques. By following the step-by-step instructions in this guide, you have transformed your kitchen into a beautiful and functional space. Remember to take your time, plan carefully, and use the appropriate tools and materials for the best results. Enjoy your new kitchen and the satisfaction of a job well done!