Ceiling Drywall Installation: Step-by-Step DIY
Are you tired of looking at your old, cracked ceiling? Do you want to give your room a fresh, new look? If so, then it’s time to consider installing drywall on your ceiling. With a little bit of time and effort, you can transform your space into something beautiful and modern. In this step-by-step guide, we will walk you through the process of ceiling drywall installation, providing you with all the information you need to complete this DIY project successfully.
Materials and Tools You Will Need
Before you begin your ceiling drywall installation project, it’s essential to gather all the necessary materials and tools. Here’s a comprehensive list of what you’ll need:
- Drywall sheets
- Drywall screws
- Drywall joint compound
- Drywall tape
- Joint knives
- Measuring tape
- Pencil
- Utility knife
- Screw gun or drill
- Sanding block or sandpaper
- Ladder or scaffolding
- Safety goggles
- Dust mask
Make sure you have all these items ready before you start the installation process. It will save you time and ensure a smooth workflow.
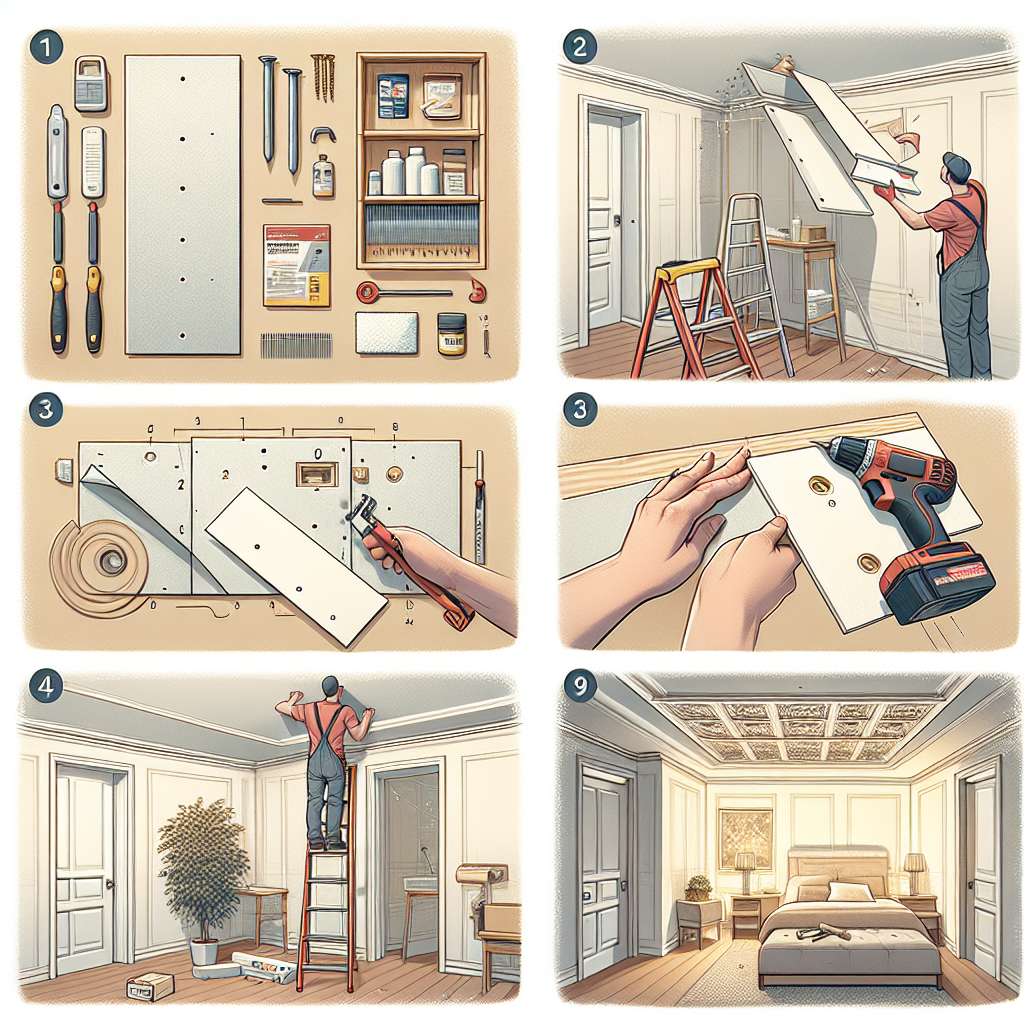
Step 1: Prepare the Room
The first step in any DIY project is to prepare the room. Start by removing any furniture or fixtures that may obstruct your work area. Cover the floor with drop cloths or plastic sheets to protect it from dust and debris. Additionally, turn off the electricity to the room to ensure your safety.
Step 2: Measure and Mark
Measure the dimensions of your ceiling using a measuring tape. Mark these measurements on the drywall sheets using a pencil. Make sure to account for any openings, such as vents or light fixtures, by measuring and marking those as well.
Step 3: Cut the Drywall Sheets
Using a utility knife, carefully cut the drywall sheets according to the measurements and markings you made in the previous step. Take your time and ensure clean, straight cuts. Remember to wear safety goggles and a dust mask to protect yourself from any flying debris.
Step 4: Install the Drywall Sheets
With the help of a ladder or scaffolding, lift the first drywall sheet and position it against the ceiling. Use a screw gun or drill to secure the sheet to the ceiling joists with drywall screws. Place screws approximately every 12 inches along the edges and every 16 inches in the field of the sheet. Repeat this process for each drywall sheet until the entire ceiling is covered.
Step 5: Apply Joint Compound and Tape
Once all the drywall sheets are installed, it’s time to apply joint compound and tape to create a seamless finish. Start by applying a thin layer of joint compound over the seams between the sheets using a joint knife. Then, press drywall tape into the compound, ensuring it covers the entire seam. Use the joint knife to smooth out any excess compound and remove air bubbles. Allow the compound to dry completely before moving on to the next step.
Step 6: Sand and Repeat
After the joint compound has dried, use a sanding block or sandpaper to smooth out any rough edges or imperfections. Be careful not to sand too aggressively, as you don’t want to damage the drywall. Once you’ve finished sanding, apply another layer of joint compound and repeat the taping process. This will help create a seamless and professional-looking finish.
Step 7: Finishing Touches
Once you’re satisfied with the smoothness of your ceiling, it’s time for the finishing touches. Apply a final layer of joint compound over the entire ceiling, feathering the edges to blend it seamlessly with the rest of the surface. Allow the compound to dry completely, and then sand it lightly to achieve a smooth finish. Your ceiling is now ready for paint or any other decorative treatment you desire.
Estimated Time and Final Thoughts
The time it takes to complete a ceiling drywall installation project will vary depending on the size of the room and your level of experience. On average, it can take anywhere from a few days to a week to finish the entire process, including drying times. Remember to take breaks and pace yourself to avoid fatigue.
Installing drywall on your ceiling is a rewarding DIY project that can significantly enhance the look and feel of your space. By following these step-by-step instructions and using the right materials and tools, you’ll be able to achieve professional results. So, roll up your sleeves, put on your safety gear, and get ready to transform your ceiling into a work of art!


