Replacing Ceiling Drywall: DIY Steps & Tips
Replacing ceiling drywall can be a daunting task, but with the right tools and knowledge, it is a project that you can tackle on your own. Whether you are dealing with water damage, cracks, or simply want to update the look of your ceiling, this step-by-step guide will walk you through the process of replacing ceiling drywall. By following these instructions and tips, you will be able to achieve professional-looking results and transform your space.
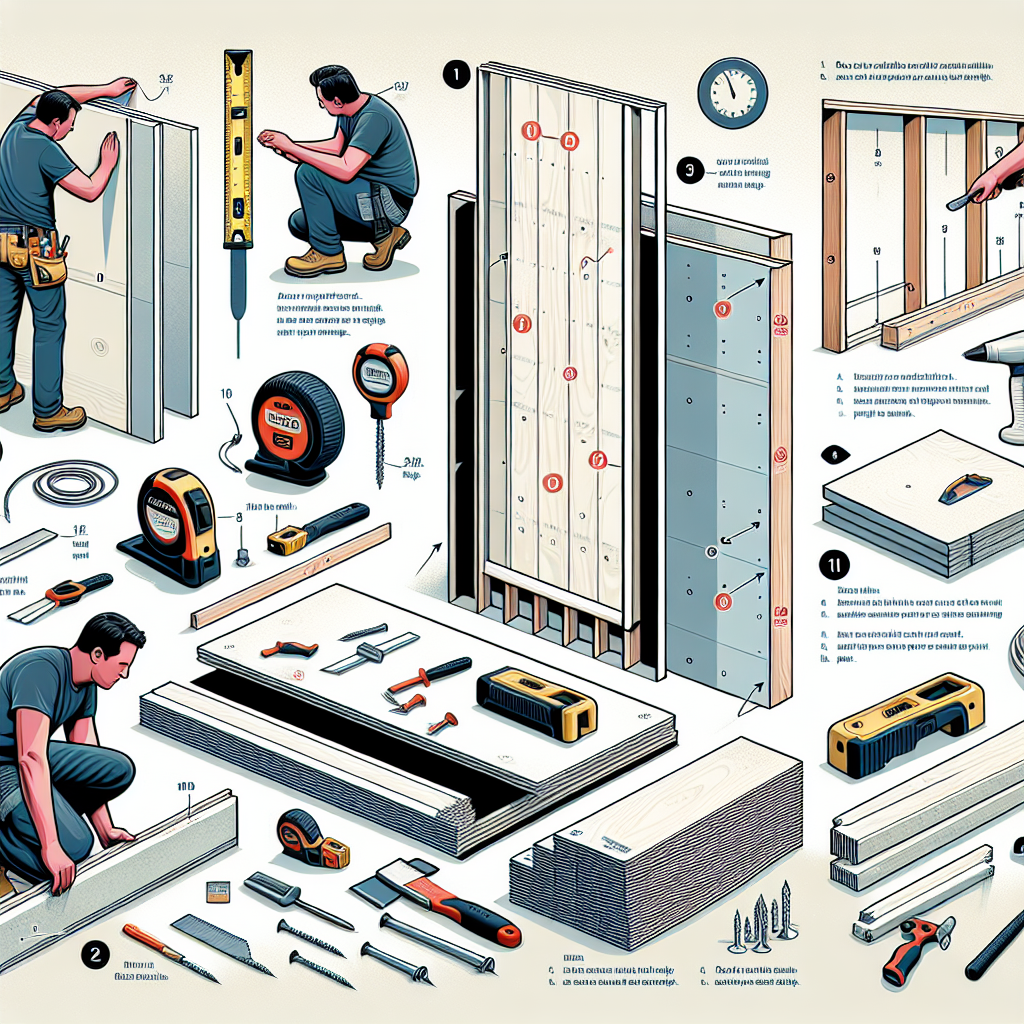
Materials and Tools You Will Need
Before you begin, gather all the necessary materials and tools to ensure a smooth and efficient process. Here is a list of what you will need:
- Drywall sheets
- Drywall screws
- Drywall joint compound
- Drywall tape
- Utility knife
- Tape measure
- Screwdriver or drill
- T-square
- Putty knife
- Sanding block or sandpaper
- Paint and paintbrush
Step 1: Prepare the Area
Before you start removing the old drywall, it is important to prepare the area properly. Follow these steps:
- Clear the room of any furniture or objects that may obstruct your work.
- Cover the floor with a drop cloth or plastic sheeting to protect it from dust and debris.
- Turn off the electricity to the room at the circuit breaker to ensure your safety.
- Remove any light fixtures or ceiling fans that may be in the way.
Step 2: Remove the Old Drywall
Now that you have prepared the area, it’s time to remove the old drywall. Follow these steps:
- Locate the ceiling joists using a stud finder and mark their positions with a pencil.
- Using a utility knife, score along the edges of the damaged drywall to create a clean line.
- Insert a pry bar or crowbar into the scored line and gently pry the old drywall away from the ceiling joists.
- Continue removing the old drywall until the entire damaged section is removed.
Step 3: Measure and Cut the New Drywall
With the old drywall removed, it’s time to measure and cut the new drywall to fit the space. Follow these steps:
- Measure the dimensions of the opening in the ceiling and transfer those measurements onto the new drywall.
- Using a T-square and a utility knife, score along the measurements to create a clean line.
- Hold the scored drywall sheet firmly and snap it along the scored line.
- Use a utility knife to cut through the paper backing on the other side of the drywall.
Step 4: Install the New Drywall
Now that you have the new drywall cut to size, it’s time to install it. Follow these steps:
- Position the new drywall sheet against the ceiling joists, making sure it fits snugly into the opening.
- Using a drill or screwdriver, secure the drywall to the ceiling joists with drywall screws.
- Space the screws approximately 12 inches apart along the edges and 16 inches apart in the field of the drywall.
- Repeat this process for each sheet of drywall until the entire damaged area is covered.
Step 5: Tape and Mud the Seams
With the new drywall installed, it’s time to tape and mud the seams to create a seamless finish. Follow these steps:
- Apply a thin layer of drywall joint compound along the seams using a putty knife.
- Place drywall tape over the wet joint compound, pressing it firmly into place.
- Using the putty knife, smooth out any excess joint compound and remove any air bubbles.
- Allow the joint compound to dry completely, then apply a second and third coat, feathering the edges to create a smooth transition.
Step 6: Sand and Paint
Once the joint compound is dry, it’s time to sand and paint the new drywall. Follow these steps:
- Use a sanding block or sandpaper to smooth out any rough edges or imperfections in the joint compound.
- Wipe away any dust with a damp cloth or sponge.
- Apply a coat of primer to the entire ceiling to ensure even paint coverage.
- Once the primer is dry, apply two coats of paint, allowing each coat to dry before applying the next.
Step 7: Clean Up
With the project complete, it’s time to clean up and enjoy your newly replaced ceiling. Follow these steps:
- Remove the drop cloth or plastic sheeting from the floor and dispose of any debris.
- Reinstall any light fixtures or ceiling fans that were removed.
- Return the furniture and objects to the room.
- Turn the electricity back on at the circuit breaker.
Conclusion
Replacing ceiling drywall may seem like a challenging task, but with the right tools and instructions, it is a project that you can successfully complete on your own. By following the step-by-step guide outlined in this article, you will be able to replace your ceiling drywall and achieve professional-looking results. Remember to take your time, follow safety precautions, and enjoy the process. Soon enough, you will have a beautiful new ceiling that enhances the overall look of your space.