Pre Rock Drywall: A DIY Installation Guide
Are you ready to take on a new DIY project? Look no further than pre rock drywall installation! With the right tools and a little bit of patience, you can transform any space in your home. In this comprehensive guide, we will walk you through the step-by-step process of installing pre rock drywall. By the end, you’ll have the knowledge and confidence to tackle this project on your own. Let’s get started!
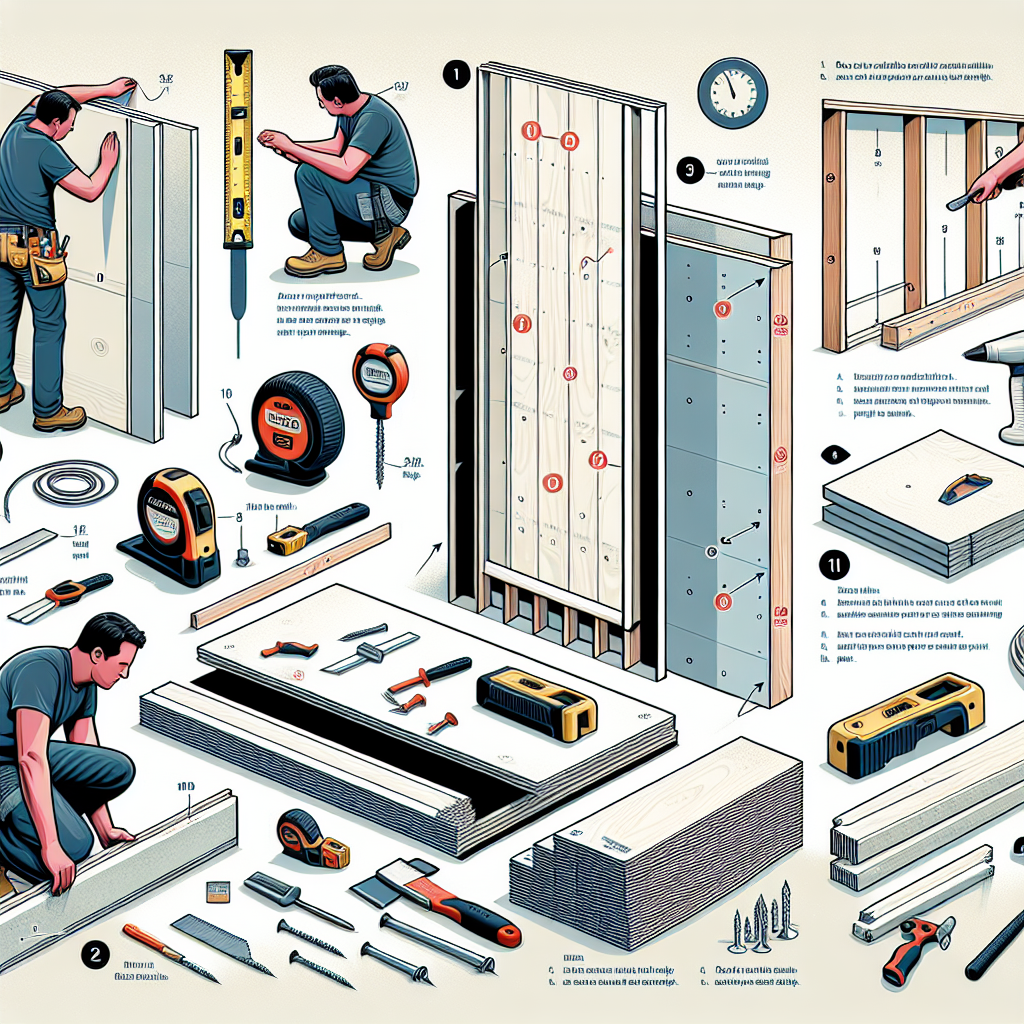
Materials You’ll Need
- Pre rock drywall sheets
- Drywall screws
- Drywall joint compound
- Drywall tape
- Drywall corner bead
- Sanding block
- Utility knife
- T-square
- Drill
- Screwdriver
- Joint knife
- Measuring tape
- Safety goggles
- Dust mask
Step 1: Prepare the Space
Before you begin installing pre rock drywall, it’s important to prepare the space properly. Start by removing any existing wall coverings, such as wallpaper or old drywall. Make sure the surface is clean and free of debris. If necessary, repair any damaged areas or fill in holes with spackle. Once the surface is smooth and ready, you can move on to the next step.
Step 2: Measure and Cut the Drywall Sheets
Using a measuring tape and T-square, carefully measure the dimensions of the wall or ceiling where you will be installing the pre rock drywall. Transfer these measurements onto the drywall sheets, making sure to account for any openings such as windows or doors. Use a utility knife to score the drywall along the measurements, and then snap it along the scored line. Repeat this process for each sheet of drywall you will be installing.
Step 3: Install the Drywall Sheets
With the drywall sheets cut to size, it’s time to start installing them. Begin by positioning the first sheet against the wall or ceiling, making sure it is level and flush. Use a drill and drywall screws to secure the sheet in place, placing screws every 12 inches along the edges and every 16 inches in the field. Continue this process for each sheet, making sure to leave a small gap between them for expansion.
Step 4: Tape and Mud the Joints
Once all the drywall sheets are installed, it’s time to tape and mud the joints. Start by applying a thin layer of joint compound along each joint, using a joint knife to smooth it out. Next, place drywall tape over the joint and press it into the compound. Use the joint knife to remove any excess compound and smooth out the tape. Allow the compound to dry completely before moving on to the next step.
Step 5: Apply Additional Layers of Joint Compound
After the first layer of joint compound has dried, it’s time to apply additional layers to achieve a smooth finish. Use a joint knife to apply a second layer of compound over the taped joints, extending it slightly beyond the edges. Feather the edges of the compound to blend it with the surrounding drywall. Allow each layer to dry before applying the next, and repeat this process until the joints are completely smooth.
Step 6: Install Drywall Corner Bead
To protect the corners of your walls or ceilings, install drywall corner bead. Measure and cut the corner bead to fit, and then secure it in place with drywall screws. Apply joint compound over the corner bead, using a joint knife to smooth it out. Allow the compound to dry before sanding it down to achieve a seamless finish.
Step 7: Sand and Finish
Once all the joint compound is dry, it’s time to sand and finish the drywall. Use a sanding block to smooth out any rough areas or imperfections. Be sure to wear safety goggles and a dust mask to protect yourself from the dust. After sanding, wipe down the walls or ceiling with a damp cloth to remove any remaining dust. Your pre rock drywall installation is now complete!
Project Completion
Congratulations on completing your pre rock drywall installation! Take a step back and admire your handiwork. The newly transformed space is now ready for paint or any other finishing touches you desire. Remember, practice makes perfect, so don’t be discouraged if your first attempt isn’t flawless. With each project, you’ll gain more experience and confidence. Enjoy the satisfaction of a job well done!
Summary
In this comprehensive DIY installation guide, we have walked you through the step-by-step process of installing pre rock drywall. From preparing the space to sanding and finishing, each step is crucial to achieving a professional result. By following these instructions and using the right tools and materials, you can transform any space in your home. So grab your tools and get ready to tackle your next DIY project!


