DIY Guide: Building a Dry Stone Wall Effectively
Are you looking to add a touch of rustic charm to your garden or landscape? Building a dry stone wall can be a rewarding and fulfilling project that not only enhances the aesthetics of your outdoor space but also provides a functional boundary. In this comprehensive guide, we will walk you through the step-by-step process of building a dry stone wall effectively. So, roll up your sleeves and let’s get started!
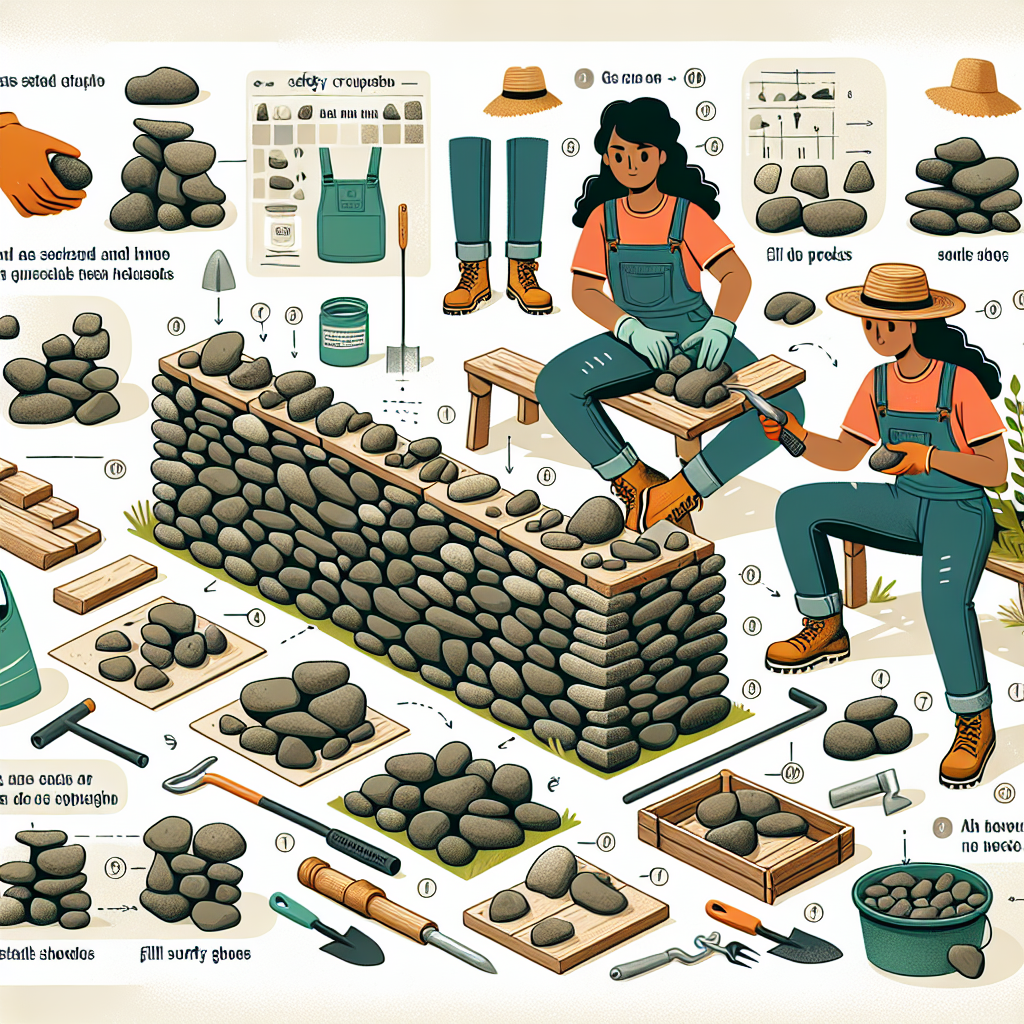
Materials and Tools You Will Need
Before diving into the construction process, it’s essential to gather all the necessary materials and tools. Here’s a list of what you’ll need:
- Stone: Choose stones that are suitable for dry stone wall construction, such as limestone or sandstone. Aim for a variety of sizes and shapes to create a visually appealing wall.
- String and stakes: These will be used to mark the boundaries and guide the construction process.
- Shovel: A sturdy shovel will help you dig the foundation trench and remove any excess soil.
- Rake: Use a rake to level the ground and remove any debris or rocks.
- Level: A level is crucial for ensuring that your wall is straight and level throughout the construction process.
- Hammer: You’ll need a hammer to tap the stones into place and make adjustments as needed.
- Chisel: A chisel will come in handy for shaping stones and creating a snug fit.
- Safety gear: Don’t forget to wear gloves, safety glasses, and sturdy footwear to protect yourself during the construction process.
Step-by-Step Instructions
Step 1: Planning and Preparation
Before you start building, take some time to plan and prepare the area where your dry stone wall will be constructed. Follow these steps:
- Mark the boundaries: Use string and stakes to mark the boundaries of your wall. This will give you a clear idea of the space you have to work with.
- Clear the area: Remove any vegetation, rocks, or debris from the construction site. Level the ground using a rake.
- Dig the foundation trench: Dig a trench along the marked boundary, ensuring that it is wide enough to accommodate the first row of stones and deep enough to provide stability.
Step 2: Laying the Foundation
The foundation is crucial for the stability and longevity of your dry stone wall. Follow these steps to lay a solid foundation:
- Add a layer of gravel: Fill the foundation trench with a layer of gravel to improve drainage and prevent water buildup.
- Compact the gravel: Use a tamper or the back of a shovel to compact the gravel layer. This will create a stable base for your wall.
- Level the foundation: Use a level to ensure that the gravel layer is even and level throughout the trench.
Step 3: Building the Wall
Now comes the exciting part – building the dry stone wall itself. Follow these steps to create a sturdy and visually appealing wall:
- Choose your stones: Select stones of various sizes and shapes. Start with larger stones for the base and gradually work your way up with smaller stones.
- Place the first stone: Position the first stone at one end of the foundation trench. Ensure that it is level and firmly embedded in the gravel.
- Add more stones: Continue adding stones, making sure to interlock them and create a tight fit. Use a hammer and chisel to shape stones if necessary.
- Check for stability: Regularly check the stability of the wall by gently pushing against it. Make adjustments as needed to ensure a solid structure.
- Build in layers: Work your way up by adding additional layers of stones. Stagger the joints between stones to increase stability.
- Step back and assess: Take a step back every now and then to assess the overall look and alignment of the wall. Make any necessary adjustments to maintain a straight and visually pleasing structure.
Step 4: Finishing Touches
Once you’ve completed the construction of your dry stone wall, it’s time to add the finishing touches:
- Clean the stones: Use a brush or broom to remove any dirt or debris from the surface of the wall.
- Inspect for stability: Carefully inspect the entire wall for any loose stones or areas that may require additional support. Make any necessary adjustments.
- Enjoy your masterpiece: Step back and admire your beautifully constructed dry stone wall. Take a moment to appreciate the hard work and craftsmanship that went into its creation.
Estimated Time and Final Thoughts
The time required to build a dry stone wall will vary depending on the size and complexity of the project. However, as a general guideline, a small to medium-sized wall can be completed within a few weekends of dedicated work.
Building a dry stone wall is a labor-intensive project that requires patience, attention to detail, and a love for working with natural materials. However, the end result is a stunning and timeless addition to your outdoor space that will be admired for years to come.
Remember to take breaks, stay hydrated, and work at a pace that is comfortable for you. Don’t rush the process – building a dry stone wall is as much about the journey as it is about the destination.
So, gather your materials, put on your gloves, and embark on this rewarding DIY adventure. With careful planning and precise execution, you’ll soon have a beautiful dry stone wall that will stand the test of time.


