Building a Rock Garden: A Step-by-Step Guide
Are you looking to add a touch of natural beauty to your outdoor space? A rock garden can be the perfect solution. Not only does it provide a low-maintenance landscaping option, but it also adds texture and visual interest to your garden. In this step-by-step guide, we will walk you through the process of building your own rock garden, from planning to completion. So, roll up your sleeves and let’s get started!
Step 1: Planning
Before you begin digging and placing rocks, it’s important to have a clear plan in mind. Take some time to envision how you want your rock garden to look. Consider the size, shape, and location of your garden. Will it be a small corner feature or a sprawling landscape? Once you have a vision, measure the area and sketch out a rough design on paper.
Next, think about the types of rocks you want to use. Do you prefer large boulders or smaller pebbles? Consider the colors and textures that will complement your existing landscape. It’s also important to choose rocks that are native to your region, as they will blend seamlessly with the natural surroundings.
Finally, decide on the plants that will thrive in your rock garden. Opt for low-maintenance, drought-tolerant species that can withstand the harsh conditions often found in rock gardens. Some popular choices include succulents, alpine plants, and ornamental grasses.
Step 2: Gathering Materials
Now that you have a plan in place, it’s time to gather the necessary materials. Here’s a list of what you’ll need:
- Shovel
- Rake
- Gloves
- Landscape fabric
- Wheelbarrow
- Rock or gravel
- Plants
- Mulch
- Watering can or hose
Make sure to choose rocks that are appropriate for your garden’s size and design. You can find a wide variety of rocks at your local garden center or quarry. Consider renting a truck or trailer if you need to transport large rocks.
Step 3: Preparing the Site
Now that you have all your materials, it’s time to prepare the site for your rock garden. Follow these steps:
- Clear the area of any existing vegetation or debris. Use a shovel or rake to remove grass, weeds, and rocks.
- Level the ground using a rake. This will ensure a smooth surface for your landscape fabric.
- Install landscape fabric to prevent weeds from growing through your rock garden. Cut the fabric to fit the area and secure it with landscape staples.
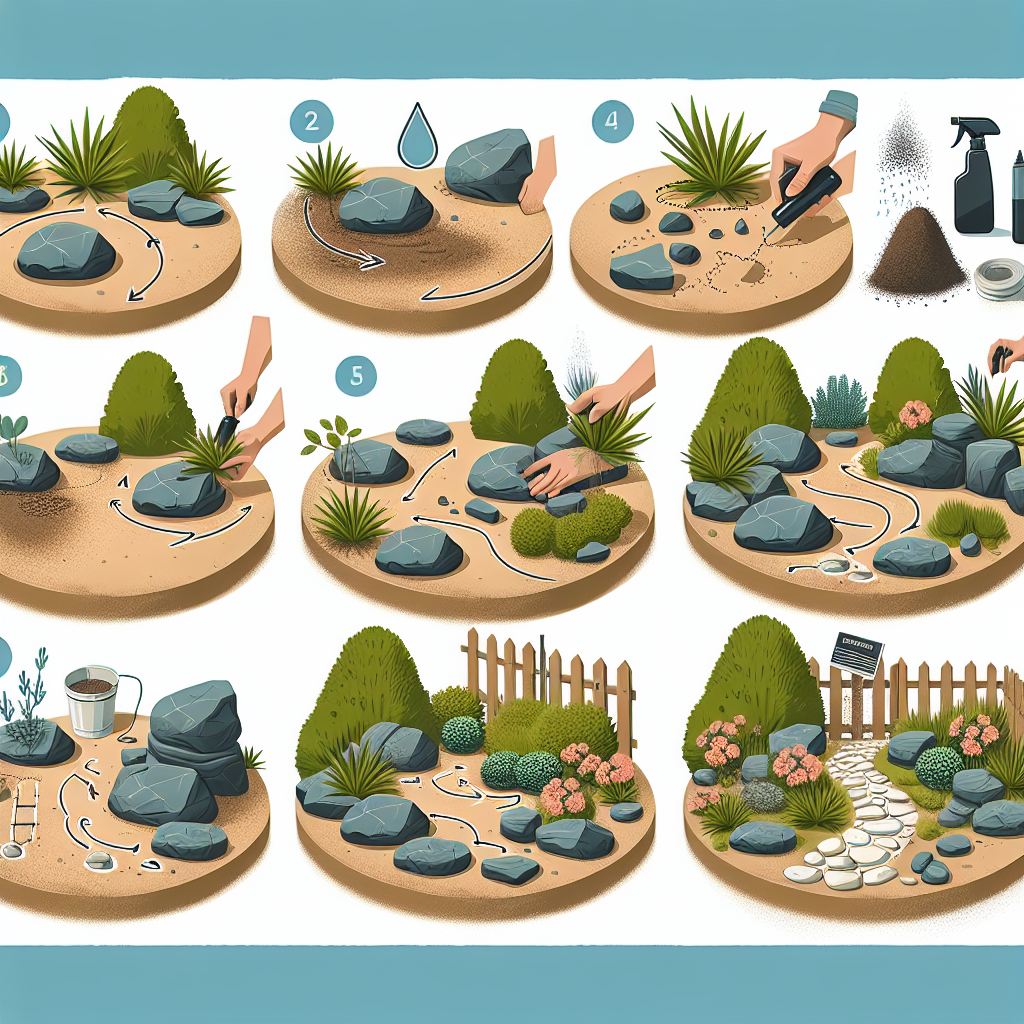
Step 4: Placing the Rocks
Now comes the fun part – placing the rocks! Follow these steps to create an aesthetically pleasing arrangement:
- Start with the largest rocks and place them strategically throughout the garden. These rocks will serve as focal points and anchors for the rest of the design.
- Arrange medium-sized rocks around the larger ones, creating a natural flow and balance.
- Fill in any gaps with smaller rocks or gravel. This will help create a cohesive look and prevent soil erosion.
Remember to step back and assess your design as you go. Make adjustments as needed to achieve the desired look.
Step 5: Adding Plants
Now that your rocks are in place, it’s time to add the plants. Follow these steps to ensure their success:
- Dig holes for each plant, making sure they are deep enough to accommodate the root ball.
- Place the plants in the holes and backfill with soil. Gently firm the soil around the base of each plant.
- Water the plants thoroughly to help them establish roots. Continue to water regularly, especially during dry spells.
Remember to choose plants that are suitable for your climate and the specific conditions of your rock garden. Consider their mature size and spacing requirements to ensure they have enough room to thrive.
Step 6: Adding the Finishing Touches
To complete your rock garden, add some finishing touches:
- Spread a layer of mulch around the base of your plants. This will help retain moisture and suppress weed growth.
- Consider adding decorative elements such as stepping stones, a bench, or a small water feature to enhance the overall look of your garden.
- Regularly maintain your rock garden by removing weeds, pruning plants, and replenishing mulch as needed.
Step 7: Enjoying Your Rock Garden
Now that your rock garden is complete, take a step back and admire your hard work. Sit back, relax, and enjoy the beauty of your new outdoor oasis. Your rock garden will provide years of enjoyment with minimal maintenance.
Remember, building a rock garden is a creative process, so don’t be afraid to experiment and make it your own. With the right materials, careful planning, and a little bit of patience, you can create a stunning rock garden that will be the envy of your neighborhood. So, grab your tools and start building – your rock garden awaits!


