DIY Hardwood Floor Refinishing for a Fresh Look
Are your hardwood floors looking dull and worn out? Do you want to give them a fresh new look without breaking the bank? Look no further! In this comprehensive guide, we will walk you through the step-by-step process of refinishing your hardwood floors to bring back their natural beauty. With a little time, effort, and the right tools, you can transform your floors into a stunning focal point of your home.
Materials You Will Need
- Safety goggles
- Dust mask
- Gloves
- Sanding machine
- Sandpaper (grit 36, 60, 80, and 120)
- Shop vacuum
- Tack cloth
- Wood stain
- Brush or roller
- Clear polyurethane finish
- Paint tray
- Paintbrush
- Lambswool applicator
- Painter’s tape
- Plastic sheeting
- Hammer
- Nails
- Putty knife
- Wood filler
- Sanding block
- Stain applicator
Step 1: Prepare the Room
Before you begin the refinishing process, it’s important to prepare the room properly. Start by removing all furniture, rugs, and other items from the room. This will give you a clear workspace and prevent any damage to your belongings. Next, cover any vents, electrical outlets, and light fixtures with plastic sheeting and secure them with painter’s tape to protect them from dust and debris.
Step 2: Inspect and Repair the Floor
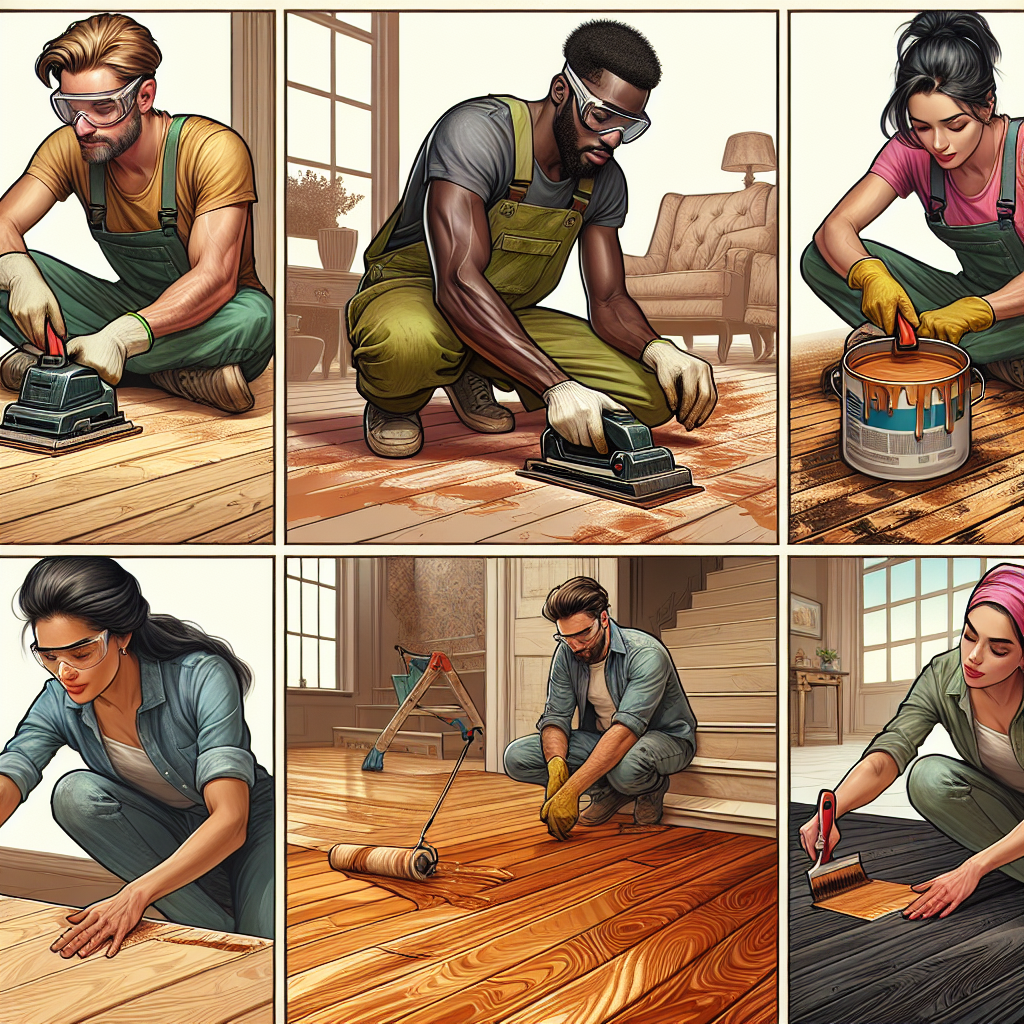
Thoroughly inspect your hardwood floor for any signs of damage, such as cracks, scratches, or loose boards. Use a hammer and nails to secure any loose boards back in place. For small cracks and scratches, use a putty knife and wood filler to fill them in. Allow the filler to dry completely before moving on to the next step.
Step 3: Sand the Floor
Now it’s time to sand the floor to remove the old finish and reveal the fresh wood underneath. Start with a coarse-grit sandpaper (grit 36) and sand the entire floor in the direction of the wood grain. Use a sanding machine for larger areas and a sanding block for smaller, hard-to-reach areas. Be sure to wear safety goggles and a dust mask to protect yourself from the dust.
Once you have sanded the floor with the coarse-grit sandpaper, switch to a medium-grit sandpaper (grit 60) and sand the floor again. This will help smooth out any rough spots left by the coarse-grit sandpaper. Repeat the process with a fine-grit sandpaper (grit 80) and then a very fine-grit sandpaper (grit 120) for a smooth and even finish.
Step 4: Clean the Floor
After sanding, it’s important to thoroughly clean the floor to remove any dust and debris. Use a shop vacuum to vacuum up the dust, and then use a tack cloth to wipe down the entire floor. Make sure to get into all the corners and crevices to ensure a clean surface for staining and finishing.
Step 5: Stain the Floor
Now comes the fun part – staining the floor! Choose a wood stain color that complements your home’s décor and apply it using a brush or roller. Start in a corner of the room and work your way towards the exit to avoid stepping on the freshly stained floor. Apply the stain in thin, even coats, following the manufacturer’s instructions for drying time between coats.
For a more even and professional-looking finish, consider using a lambswool applicator to apply the stain. This will help distribute the stain evenly and prevent streaks or blotches. Be sure to wear gloves to protect your hands from the stain.
Step 6: Apply the Finish
Once the stain has dried completely, it’s time to apply the finish to protect and seal the wood. Choose a clear polyurethane finish for a durable and long-lasting result. Pour the finish into a paint tray and use a paintbrush to cut in around the edges of the room. Then, use a lambswool applicator to apply the finish to the rest of the floor in long, even strokes.
Apply the finish in thin coats, following the manufacturer’s instructions for drying time between coats. Be sure to work in a well-ventilated area and avoid walking on the floor until the finish has dried completely. Depending on the type of finish you choose, you may need to apply multiple coats for optimal protection and shine.
Step 7: Enjoy Your Beautiful Floors
Once the final coat of finish has dried, you can move your furniture back into the room and enjoy your newly refinished hardwood floors. Take a moment to admire the transformation and bask in the satisfaction of a job well done. Your floors will now have a fresh, rejuvenated look that will impress your family and friends.
Conclusion
Refinishing your hardwood floors is a rewarding DIY project that can breathe new life into your home. By following these step-by-step instructions and using the right tools and materials, you can achieve professional-looking results without the hefty price tag. So roll up your sleeves, put on your safety gear, and get ready to transform your floors into a stunning masterpiece!

