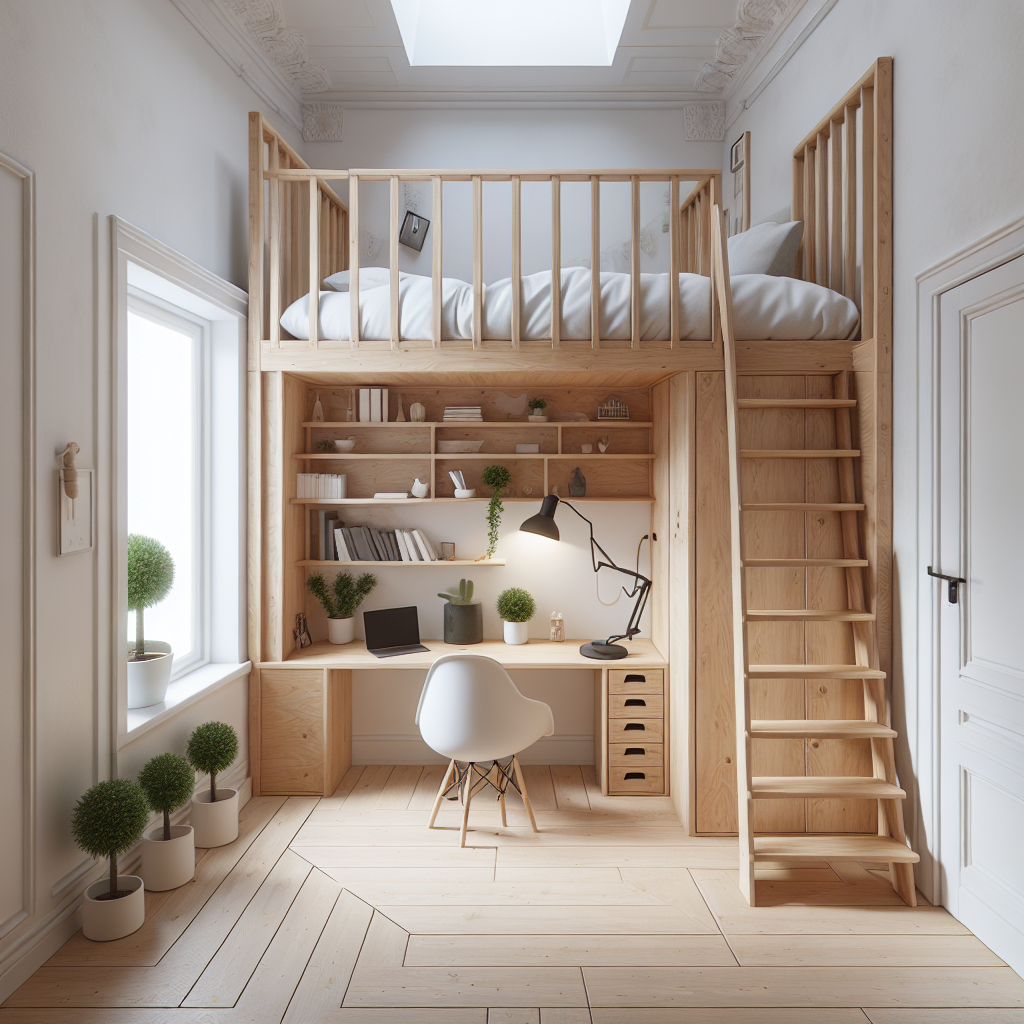
Space-Saving Loft Bed Installation for Small Bedrooms
Are you tired of feeling cramped in your small bedroom? Do you dream of having more space to move around and store your belongings? Look no further! In this comprehensive guide, we will teach you how to install a space-saving loft bed in your small bedroom. With just a few simple steps, you can transform your room into a functional and stylish oasis. So, let’s get started!
Materials Needed
- Loft bed frame
- Wood screws
- Drill
- Measuring tape
- Level
- Hammer
- Screwdriver
- Paint or stain (optional)
- Decorative accessories (optional)
Step 1: Measure and Plan
The first step in installing a loft bed is to measure your room and plan the layout. Measure the height, width, and length of your room to determine the size of the loft bed frame you will need. Consider the placement of windows, doors, and other furniture in the room to ensure that the loft bed will fit comfortably without obstructing any pathways.
Step 2: Choose the Right Loft Bed Frame
Once you have determined the dimensions of your room, it’s time to choose the right loft bed frame. Look for a frame that is sturdy, durable, and fits your style preferences. Consider whether you want a loft bed with a built-in desk, storage compartments, or other features that can maximize the functionality of your small bedroom.
Step 3: Prepare the Room
Before you begin the installation process, clear out the room and remove any existing furniture or decorations that may be in the way. This will give you a clean slate to work with and make the installation process much easier.
Step 4: Assemble the Loft Bed Frame
Follow the manufacturer’s instructions to assemble the loft bed frame. Use the provided screws, drill, and screwdriver to secure all the pieces together. Make sure to double-check that all the connections are tight and secure to ensure the safety and stability of the loft bed.
Step 5: Install the Loft Bed
With the loft bed frame fully assembled, it’s time to install it in your small bedroom. Enlist the help of a friend or family member to assist you with this step, as loft beds can be heavy and difficult to maneuver on your own.
- Position the loft bed frame in the desired location in your room. Use a level to ensure that the frame is perfectly horizontal.
- Once the frame is level, use a drill and wood screws to attach the frame to the wall for added stability. Make sure to screw into wall studs for maximum support.
- Double-check that the loft bed is securely attached to the wall and can support the weight of an adult. Safety should always be a top priority when installing loft beds.
Step 6: Customize and Decorate
Now that your loft bed is installed, it’s time to customize and decorate your small bedroom to make it your own. Consider painting or staining the loft bed frame to match your personal style. Add decorative accessories such as curtains, string lights, or a cozy rug to create a warm and inviting space.
Step 7: Enjoy Your New Space-Saving Loft Bed
Congratulations! You have successfully installed a space-saving loft bed in your small bedroom. Take a step back and admire your handiwork. Enjoy the newfound space and functionality that your loft bed provides. Whether you use the area underneath for a cozy reading nook, a home office, or extra storage, your small bedroom will never be the same again.
Conclusion
Installing a space-saving loft bed in your small bedroom is a game-changer. It not only provides you with extra space but also adds a touch of style and functionality to your room. By following the step-by-step instructions in this guide, you can easily transform your cramped bedroom into a spacious oasis. So, what are you waiting for? Get started on your loft bed installation project today and enjoy the benefits for years to come!


